
Opening a demo or sample code from GIT is relatively easy if you are an experienced Codename One developer but for a lot of newer developers for whom samples are often more crucial this can be challenging. One of our solutions was placing the demos in the Codename One new project menu but that’s probably not enough.
First before we begin with the step by step guide let’s explain what is happening…
Why Doesn’t a Project “Just Work”?
There are two major reasons:
We don’t include the required JAR files/cn1lib dependencies and some of the required empty folders
Projects are usually built for NetBeans so if you use a different IDE they won’t work
Both of these are easy to fix, but with this post I’d like to show you a trivial trick to do this that will work in NetBeans/Eclipse & IntelliJ/IDEA. The trick is to create a new project and copy the sources on top of it for everything to work…
I’ll explain this thru an example by opening and running AlphabetScroll in the 3 IDE’s using these steps.
Get the Main Class & Package Name
Open the codenameone_setting.properties for the project. Within this file find two values:
codename1.mainNamewhich in this case isAlphabetcodename1.packageNamewhich in this case iscom.codename1.demos.alphabetscroll
Create a new Project in the IDE
You can leave everything in the default settings, the only two exceptions are the package name and main class name that must match the main class & package you found in the codenameone_settings.properties.

Figure 1. Create a new project for Alphabet in NetBeans
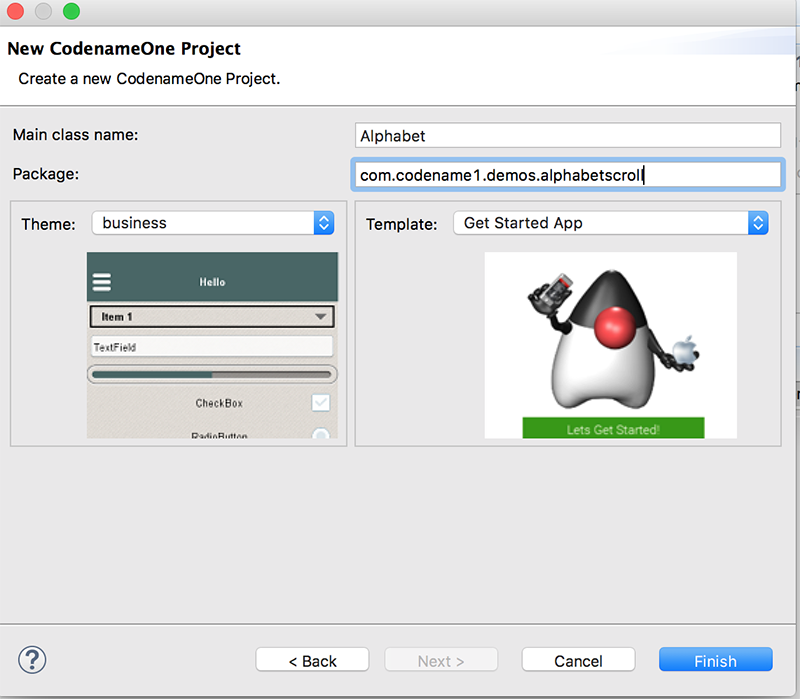
Figure 2. Create a new project for Alphabet in Eclipse
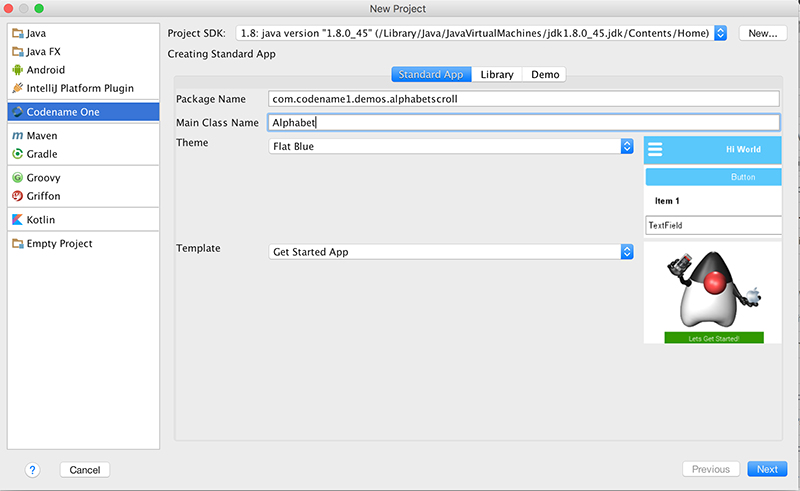
Figure 3. Create a new project for Alphabet in IntelliJ/IDEA
Copy the Files
Open the project folder outside of the IDE, replace the src directory with the one from GIT and replace the codenameone_settings.properties you have with the one from GIT.
If the git project has a native directory copy it on top of yours.
If the lib directory within the git project has any cn1lib files copy them into your lib directory & use Refresh Libs in the right click menu under the Codename One menu.
Run
You can now run a project from GIT regardless of the IDE you are using, notice that if your plugin is old you might need one additional step. Right click the project and select Codename One → Codename One Settings.
Under the Basics menu click the Update Project Libs button (bottom left). This will update the jars to the latest allowing the project to run.
Archived Comments
This post was automatically migrated from the legacy Codename One blog. The original comments are preserved below for historical context. New discussion happens in the Discussion section.
ThomasH99 — September 19, 2021 at 2:44 pm (permalink)
I just posted this comment under the post “TIP: Using Git for Codename One Projects” but I think I should have posted it here instead:
———————
Hi, is this approach is still the right way to use Git for CN1 projects using maven? (I’m no expert on either so maybe this is a basic question 🙂)
Shai Almog — September 20, 2021 at 1:47 am (permalink)
Hi,
no. I think maven is actually a bit simpler. You can just gitignor the target directory.
ThomasH99 — September 19, 2021 at 2:44 pm (permalink)
I just posted this comment under the post “TIP: Using Git for Codename One Projects” but I think I should have posted it here instead:
———————
Hi, is this approach is still the right way to use Git for CN1 projects using maven? (I’m no expert on either so maybe this is a basic question 🙂)
Discussion
Join the conversation via GitHub Discussions.