A while back we added a new TestRunnerComponent that provides a visual UI for running unit tests inside an app. Sometimes, while I’m developing unit tests, I find it easier to write them inside a regular app project instead of in the “tests” directory. This allows me to debug the unit tests in the IDE more easily, just like I debug regular apps. The TestRunner component makes it simple to do this.
All you need to do is create some unit tests in your app (i.e. a class that extends AbstractTest. E.g.
public class MyTest extends AbstractTest {


    /**
     * Overridden to return true so test runs on EDT
    @Override
    public boolean shouldExecuteOnEDT() {
        return true;
    }


    /**
     * Actual body of the test.
    @Override
    public boolean runTest() throws Exception {

        // run tests here.

        return true;
    }

    /**
     * Override toString() so that the test shows up nicely in the testrunner.
    @Override
    public String toString() {
        return "MyTest";
    }
}
You can then just add an instance of each Test class to your TestRunnerComponent. E.g. in your app’s start method you might have something like:
public void start() {
    if(current != null){
        current.show();
        return;
    }
    TestRunnerComponent runner = new TestRunnerComponent();
    runner.add(new MyTest());
    // add other tests here..

    runner.showForm();
}
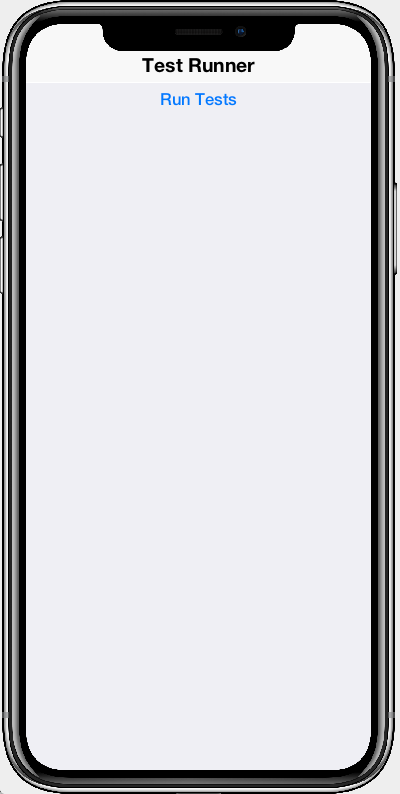
When you run the app, it will display a form with single button “Run Tests”.
When you press this button, it will run the tests and show the results on the screen.
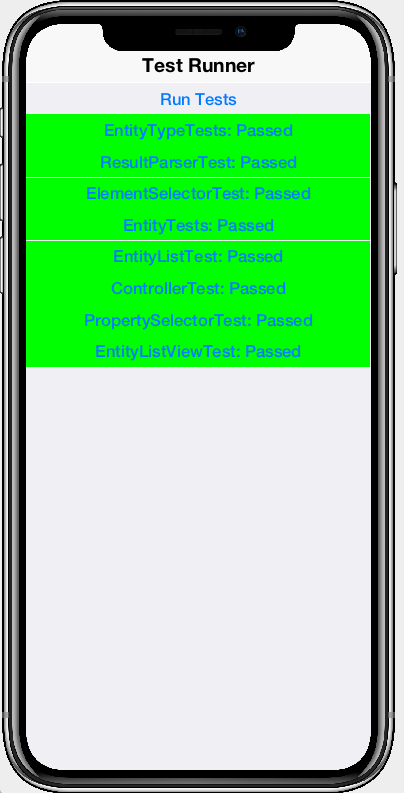
The above screenshot is taken from the CodeRADTests project which contains unit tests for the CodeRAD cn1lib.
Discussion
Join the conversation via GitHub Discussions.