
The ComponentSelector class is a new class that brings the power of jQuery to Codename One. While it is not actually jQuery, it is heavily influenced by it. If you’re not familiar with jQuery, here is the 10 second intro.
jQuery is a javascript library, created by John Resig in 2006, that has become a staple of browser-based UI development. As of March 2017, over 70% of web sites are using jQuery. The initial problem that jQuery solved was browser incompatibility issues. It provided a consistent API for most useful DOM methods so that the developer didn’t have to spend all their days and nights fighting with browser compatibility issues. In a way, it did for Javascript, what Codename One does for mobile apps.
The other thing that jQuery did, was provide an elegant way to select and manipulate DOM elements (i.e. HTML tags in a web page). It enabled developers to easily form sets of elements using a CSS-like syntax, and to operate on all elements of those sets, as if they were single elements, and they provided a fluent API to enable developers to chain multiple calls together, and delay onset of carpal tunnel for at least a few extra years.
With the new ComponentSelector class, I have adopted the following aspects of jQuery:
CSS-like Selection Syntax – Support for a CSS-like syntax for “selecting” Components to be included in a set.
Fluent API – The API is fluent, meaning you can chain multiple method calls together and reduce typing.
Working on Sets – Methods of this class operate on sets of components as if they are a single component. As you’ll see, this can be incredibly powerful.
Effects – Support for common effects on components such as fadeIn(), fadeOut(), slideDown(), and slideUp().
Motivation By Example
The following snippet creates a button, that, when pressed, will fade itself and all of its sibling components out, and then fade them back in.
import static com.codename1.ui.ComponentSelector.$;

// ...

Button slideUp = $(new Button("Slide Up")) __**(1)**
    .setIcon(FontImage.MATERIAL_EXPAND_LESS) __**(2)**
    .addActionListener(e->{ __**(3)**
        $(e) __**(4)**
            .getParent() __**(5)**
            .find(">*") __**(6)**
            .slideUpAndWait(1000) __**(7)**
            .slideDownAndWait(1000); __**(8)**
    })
    .asComponent(Button.class); __**(9)**
| __1 | – Creates a new Button and wraps it in a ComponentSelector so that we can use ComponentSelector’s fluent API to modify the button. |
|---|---|
| __2 | – Sets the icon on the button |
| __3 | – Adds an action listener to the button |
| __4 | – Wraps the source of the action event (which is the button) in a ComponentSelector so we can use fluent API. |
| __5 | – Gets button’s parent component. (Actually it is a set of components, size=1) |
| __6 | – Gets all of the direct children of the button’s parent container. |
| __7 | – Hides all of the children of the button’s parent (i.e. the button and siblings) using a slide-up effect. Duration is 1000ms. Blocks until complete. |
| __8 | – Shows the button and its siblings using a slide-down effect. |
| __9 | – Returns the button itself to assign to the slideUp local variable. |
| __ | For people like Shai who don’t like the jQuery $ syntax used for method names, you can alternatively use the select() method as an alias for $(). |
|---|
Take a close look at that example, and imagine implementing that functionality the “old” way. It actually gets pretty hairy. Hopefully that example is enough to get you interested in using ComponentSelector.
Now let’s go into some of the details of how it works and how to use it.
Selecting Components
The first thing you’ll want to do with ComponentSelector, is to select the components that will be in your set. You can do this in many ways:
You can use the CSS selector syntax. E.g.
$("Label, Button, #MyCalendar")= The set of all components on the current form with UIID=Label, or UIID=Button, or Name=MyCalendar.You can explicitly wrap one or more components. E.g.
$(myButton, myLabel, myCalendar)= A set with 3 components,myButton,myLabel, andmyCalendar.You can modify an existing set to create a new one. E.g.
$("Label").add("Button", true).add($("#MyCalendar"));= the same set formed in 1 above. (Labels, Buttons, and components with Name=MyCalendar)
Specifying the Roots for Queries
You can specify the roots for a query to limit the scope of the search. If you don’t provide a root, then the current form will be used as a root. If there is no current form yet, then a RuntimeException will be thrown. It is always a good idea to provide a root if you have one.
E.g. $("Label", myContainer) = The set of components with UIID=“Label” inside the myContainer. This will scour the full subtree of myContainer for components that match the provided selector.
You can provide multiple roots as well. E.g. $("Label", myContainer, anotherContainer) = The set of components with UIID=“Label” inside either myContainer or anotherContainer.
You could also provide set of components, and by extension a ContainerSelector (since it implements java.util.Set<Component>) as the roots. E.g. $("CalendarDay", $("Calendar")) = The set of all components with UIID “CalendarDay” inside containers with UIID=“Calendar”.
Finally, ComponentSelector provides a find() method that implicitly uses the current set as the roots. E.g. $("Calendar").find("CalendarDay") is equivalent to $("CalendarDay", $("Calendar")).
Selector Syntax
So far I’ve just glossed over the selector syntax by saying it’s “like CSS”. Though it is like CSS selectors, it is necessarily different to accommodate the differences between Codename One’s component model and Javascript’s DOM. Rather than go into a technical language definition, I’ll use some examples to illustrate the capabilities of our syntax.
$("Label")– The set of all components on the form with UIID “Label”$("#MyField")– The set of all components on the form with Name “MyField”.$(".some-tag")– The set of all components on the form with the tag “some-tag”. (I’ll discuss tags below).$("Label#MyField")– The set of all components on the form with both UIID=“Label” and Name=“MyField”.$("Label#MyField.some-tag")– The set of all components on the form with UIID=“Label”, Name=“MyField”, and tag “some-tag”.$("*")– The set of all components on the form.$(".some-tag.some-other-tag")– All components with both tags “some-tag” and “some-other-tag”$("#MyContainer *")– All components contained in the subtree whose root has Name=“MyContainer”. The “MyContainer” wouldn’t be included in this set. Only its descendants.$("#MyContainer > *")– Direct children of components with Name=“MyContainer”. (The “MyContainer” component would not be included in this set. Only its children.)$("#MyContainer > * > Label")– Direct grandchildren of components with Name=“MyContainer”. Only grand children with UIID=“Label” are included.
Tags
Some of the examples above mention the use of “tags”. Tags are analogous to “classes” in CSS. I wanted to provide the same type of functionality as CSS classes, but in Java, the term “class” is a little busy, so I decided to use the term “tag” instead. You can add as many tags to a component as you like. You can then use those tags to assist in your queries. Tags are added using the addTags() method, and they are removed using the removeTags() method.
Here is an example that uses tags to implement table striping so that even rows are a different color than odd rows in a table.
TableLayout tl = new TableLayout(numRows, numCols);
Container table = new Container(tl);
int rowNum = 0;
int colNum = 0;
for (String[] row : data) {
    colNum = 0;
    for (String cell : row) {
        table.add(
            tl.createConstraint(rowNum, colNum),
            $(new Button(cell))
                .setUIID("Label")
                .addTags(rowNum % 2 == 0 ? "even":"odd")
                .asComponent()
        );
        colNum++;
    }
    rowNum++;
}
$(".even", table)
    .setBgColor(0xcccccc)
    .setBgTransparency(255);
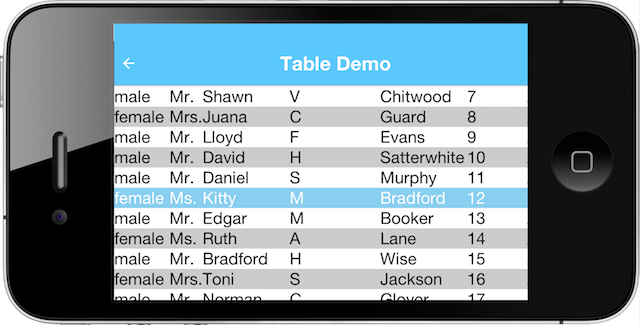
In the above example we add a tag to each label when we add it to the table or either “even” or “odd”. We then use the “even” in our ComponentSelector to set the background color and transparency of all labels in even rows. In this example, we actually build the table and set the striping in the same place, but consider the situation when the table is constructed by another API. This approach would allow the API to provide more extensibility by simply tagging the elements and allowing the library user to decide how to style the even and odd rows.
Modifying Styles
ComponentSelector includes wrappers for most of the methods of com.codename1.ui.plaf.Style so that you can easily modify the styles of selected components using a fluent API. This was demonstrated a little bit in the table striping example (setBgColor() and setBgTransparency() were called on even rows of the table). It is worth going over this in a little more detail though as Codename One styles have “state”. E.g. For the snippet of code:
$(".even", table)
    .setBgColor(0xcccccc)
    .setBgTransparency(255);
Were we setting these values on the “selected” style, the “unselected” style, the “disabled” style, “ALL” styles? In fact we were only setting these values on the “current” style. I.e. the call to setBgColor() caused something similar to the following loop to happen on all of the components in the set:
for (Component c : evenComponents) {
    c.getStyle().setBgColor(0xcccccc);
}
If a component was in “selected” state, then this would change the selected style. If it was in pressed state, then it would change the “pressed” style. Etc… What if we wanted to specifically change the styles in the “pressed” state. Then we would call selectPressedStyle() prior calling our style mutation methods. E.g.
$(".even", table)
    .selectPressedStyle()
    .setBgColor(0xcccccc)
    .setBgTransparency(255);
Alternatively, ComponentSelector supports a “state” pseudo-selector that will initialize the selected style so that you don’t have to call selectXXXStyle() before making changes. E.g. The following snippet is equivalent to the previous:
$(".even:pressed", table)
    .setBgColor(0xcccccc)
    .setBgTransparency(255);
The following “state” pseudo-selectors are available:
:pressed– Selects the “pressed” style:selected– Selects the “selected” style:unselected– Selects the “unselected” style:disabled– Selects the “disabled” style:all– Selects the ALLStyles proxy for each component (so that you can target all styles together):*– Same as:all
If you want to access Style objects directly, you can use one of:
getPressedStyle()– Returns a proxy style with all of the pressed styles of components in the set.getSelectedStyle()getUnselectedStyle()getDisabledStyle()getAllStyles()
Effects and Transitions
As mentioned above, and demonstrated in the first example of this article, ComponentSelector provides a simple way to add eye-candy to your apps. It implements the fadeIn(), fadeOut(), slideUp(), and slideDown() methods and their AndWait() derivations for showing and hiding components in your UI with style. You no longer have any excuse not to use a transition for showing and hiding elements in your UIs. Using a transition always feels nicer to the user.
In addition to these basic effects, ComponentSelector wraps all of the existing animation functionality of the Component and Container classes but with proper accommodations for animating multiple elements simultaneously.
E.g. Consider this example, that shows a button that replaces itself and all siblings with replacement labels, and then replaces them back.
Button replace = $(new Button("Replace Fade/Slide"))
    .setIcon(FontImage.MATERIAL_REDEEM)
    .addActionListener(e->{
        $(e).getParent()
            .find(">*")  __**(1)**
            .replaceAndWait(c->{ __**(2)**
                return $(new Label("Replacement")) __**(3)**
                    .putClientProperty("origComponent", c) __**(4)**
                    .asComponent();
            }, CommonTransitions.createFade(1000)) __**(5)**
            .replaceAndWait(c->{
                Component orig = (Component)c.getClientProperty("origComponent");
                if (orig != null) {
                    c.putClientProperty("origComponent", null);
                    return orig; __**(6)**
                }
                return c;

            }, CommonTransitions.createCover(CommonTransitions.SLIDE_HORIZONTAL, false, 1000)); __**(7)**


    })
    .asComponent(Button.class);
| __1 | Finds all siblings of the source button |
|---|---|
| __2 | Call replaceAndWait() with a mapping function to define the component that should replace each component. This will replace each component in the set with a replacement component in its respective container. This will also return a new ComponentSelector with the set of replacement components. |
| __3 | In our “mapper” callback, we will return a new Label component to replace each existing component. |
| __4 | We store the original component in the replacement’s client properties so that we can swap it back afterwards. |
| __5 | We use the “Fade” transition for the replacement. |
| __6 | In the second replaceAndWait() call’s mapper method, we return the original component which we retrieved from the replacement’s client properties. |
| __7 | We use a cover transition for the replacement. |
Component Method Wrappers
Most mutator methods in Component and Container include a corresponding wrapper method in ComponentSelector. Some of the more common component subclasses have corresponding wrappers as well. E.g. addActionListener(event) will add the event to all Buttons in the set. setText(txt) will set the text on all labels, text areas, and buttons. If there are other commonly used methods that you would like to see included in ComponentSelector, let me know, but I think you’ll find the current state to be fairly comprehensive.
Tree Navigation
Component and Container include a few tree navigation methods. E.g. Component.getParent() returns the parent container of the current component. In cases like this, where ComponentSelector wraps such a method, it will return a set of corresponding components resulting from calling those methods on the components in the current set.
E.g. $(comp1, comp2).getParent() will include both the parent of comp1 and comp2 (and if they have the same parent, then the set will only include a single element.
This can get interesting when you start combining these methods. E.g. $(comp1, comp2).getParent().getComponentAt(10) will be the set of components that are the 11th children of comp1 and `comp2’s parents. If neither of their parents have that many children, then it will be an empty set. If only one of them has that many, then it will be a set of size 1.
More Demos
I have posted a demo app that demonstrates a few of the things that I discuss here. The file containing most relevant source code is here.
I have also posted a short screencast of the demo app on youtube:
Archived Comments
This post was automatically migrated from the legacy Codename One blog. The original comments are preserved below for historical context. New discussion happens in the Discussion section.
Chibuike Mba — March 16, 2017 at 5:12 pm (permalink)
WOW! Steve this is cool, will definitely try things out with this coding convention. Anybody with good background knowledge of jQuery will really appreciate this. Doing native mobile like jQuery ninja. Great job. 🙂
shannah78 — March 16, 2017 at 5:21 pm (permalink)
shannah78 says:
Thanks for the kind words. Have loved jQuery for years. It really opened doors for web development. Hopefully this will have a similar effect on CN1 development.
Discussion
Join the conversation via GitHub Discussions.