Tope
, covering the slicing of a PSD image to produce small PNG images which you can later on use as image borders, backgrounds, icons etc. Tope’s technique is pretty simple and works rather well but I’d like to offer another technique as well as a better way to detect the proper layer you with to cut.
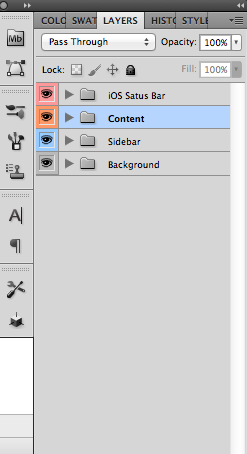
You can see the layer view by selecting Windows->Layers from the photoshop menu, on the right you can see the layers of a simple iPhone design that I have here. You will notice that every entry is collapsible.
A common paradigm designers use is to create multiple screens/forms in a singled PSD
and thus represent a “screen” (Form) of its own within the design.
So in order to see the other forms for those cases you can just hide/show each layer, in order to show individual components you can
use the eye icon to get a specific component.
Now our goal is to find a specific set of layers relevant to us and “hide” everything else so we can get the particular component we need in isolation.
This is pretty easy when the design is small, but just locating the right layer becomes a HUGE hassle as the design gets complicated and deeply nested.

Now when we click an area on the screen the layer corresponding to this specific entry will be selected in the layer view and we could manipulate it. Notice that a component is often composed of multiple layers… We usually would want to hide things such as the text layers etc. for cases such as buttons where we would want to get the button alone so we can cut it into a 9-piece border, but we would want other layers.

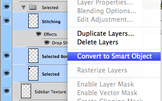
After converting to a smart object double click the layer icon (you will get a dialog with a message that is relevant only if you are interested in really changing the file), the standalone image will open in a separate tab and you will be able to use the Save As option and select PNG as the format.
Notice: This post was automatically converted using a script from an older blogging system. Some elements might not have come out as intended…. If that is the case please let us know via the comments section below.


1 Comment
there is a nice alternative solution to do this process automatically,
free little extension called Breeezy it adds to Photoshop the ability to export multiple layers in one click
you can take a look
[breeezyplugin.com](http://breeezyplugin.com)