Learn how to convert the old Codename One “ANT” project structure demos to Maven projects using the Maven Migration Tool.
Since migrating to Maven, the recommended way to create a new Codename One project is using the Codename One initializr tool. It will generate a fresh, new Maven project for you based on a template of your choosing. In order to not overwhelm you, we have thus far kept the template selections in this tool to a minimum. At the time of this writing you can choose one of:
Bare-bones template: This will set you up with a simple “hello world” app, that you can customize as required. This is available in both Java and Kotlin flavours.
GRUB: A complete sample restaurant delivery app. (Java only)
CodeRAD MVC Starter Project: A template based on the CodeRAD MVC library.
Tweet App: A template for a Twitter-style app. Also uses the CodeRAD MVC library.
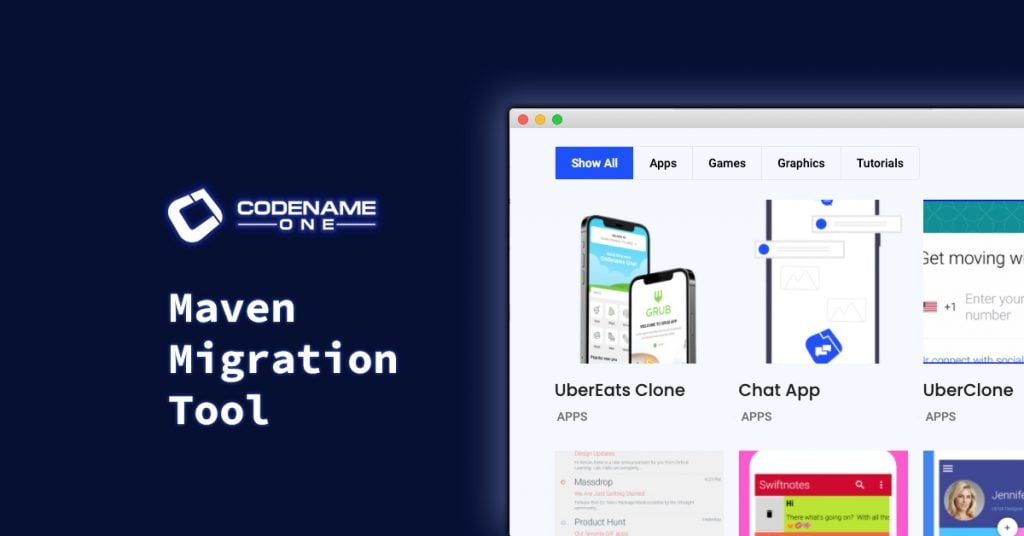
There are many other demos and templates that have been developed over the years that are not listed here. For example, there are several projects listed in the Codename One demos section of the website.

Figure 1. Demos listed in the Codename One demos section.
Many other demos can be found amongst our GitHub repositories, and there are a smattering of older demos in the codenameone-demos repository as well.
Most of these use the old “ANT” project structure, so they require some surgery to convert them to the modern Maven structure. In this article I will describe how to convert these demos to Maven projects using the Maven Migration Tool.
Step 1: Install the Codename One Maven Migration Tool
The Maven migration tool is a GUI application that converts Codename One ANT-based projects into Maven projects.
Download it for Mac, Windows, and Linux here.
Step 2: Download the Demo Project
Once you have installed the migration tool, you should download the demo project that you wish to use as the basis for your app. As an example, I’ll use the MSUIKit demo.
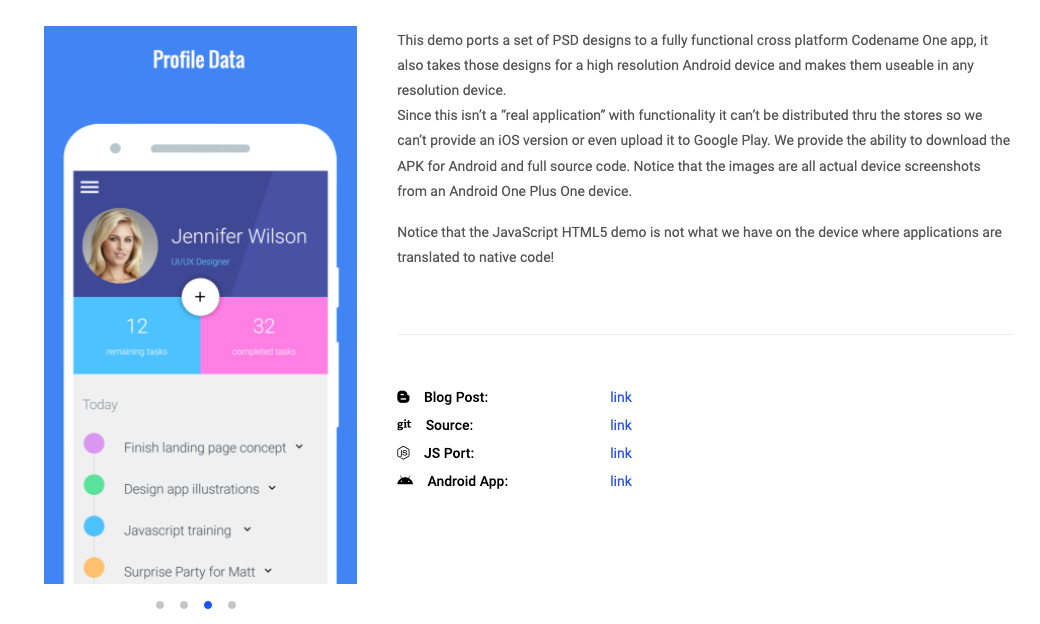
Figure 2. The MSUIKit demo
You can download this demo by clicking the Source link, then click the “Code” menu in the upper right, and select “Download ZIP”.
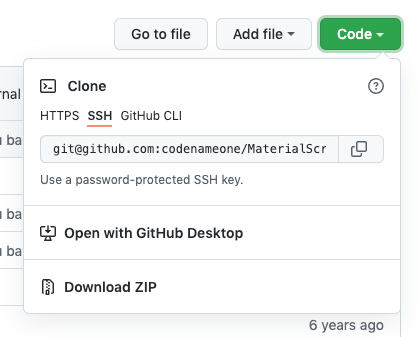
After you have downloaded the ZIP, extract it, so that you have the project in a folder on your local machine.
Step 3: Convert the Project in Maven Migration Tool
Open up the Maven migration tool application that you installed in Step 1.
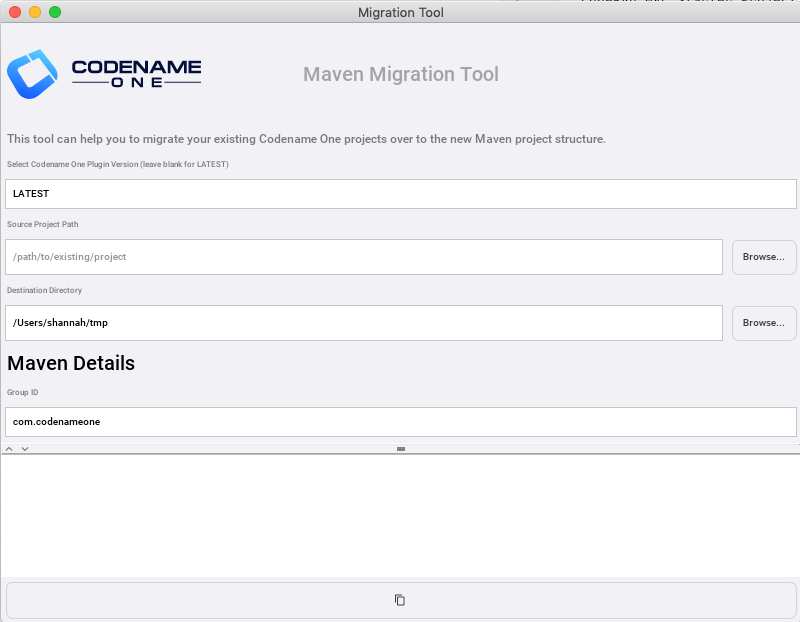
Figure 3. The Maven migration tool window
You can select the project you want to convert by pressing the “Browse…” button next to the “Source Project Path” field. Then select the “MaterialScreensUIKit” directory in the file dialog.
After you have selected this project, the migration tool form should be updated to reveal fields to edit the “Main Class Name”, and “Package Name”. They will be pre-populated with the original values from the project you are migrating, but you can change these values as appropriate for your application.
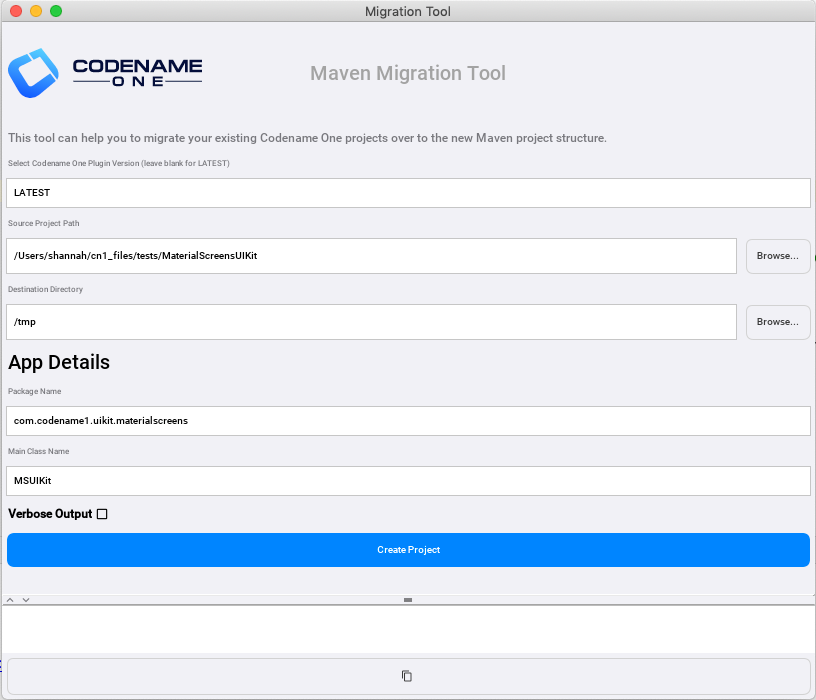
Figure 4. The “App Details” section allows you to enter a package name and Main class name for your application.
Before moving on, you should check that the “Destination Directory” field is set to the location where you want your new project to be saved.
If all of your settings look good, press the “Create Project” button. After about ten seconds, you should see a message indicating that your project was created successfully.
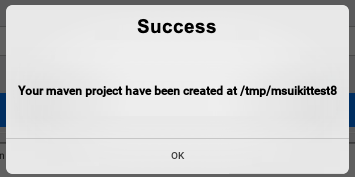
When you click the “OK” button, it should open Finder (Mac) or Explorer (Windows) to the directory where the project was saved. You can now proceed to open this project in your preferred IDE. Personally I recommend IntelliJ, but NetBeans, Eclipse, and VSCode should all work fine also. For this article, I will use IntelliJ.
Step 4: Open the Project in your IDE
Depending on your operating system, the steps to open the project in IntelliJ may vary. For example, on Mac, you can just drag the folder itself onto the IntelliJ icon in your Dock (assuming you have the IntelliJ icon in your Dock). Alternatively, you can open a command prompt and do:
					cd /path/to/theproject
idea
Alternatively, you can just open IntelliJ, and then use the “File” > “Open” menu to open the project directory.
After the project opens, you should expand the “Maven” tab on the right side of the window to see all of the build targets available to you.
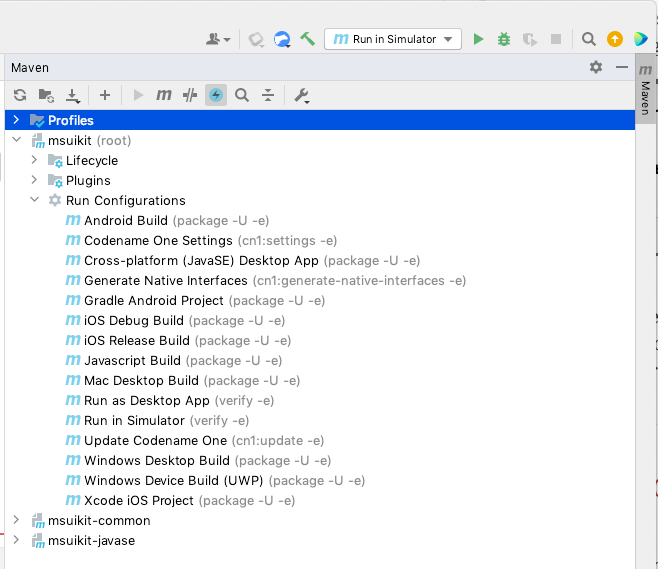
Figure 5. The “Maven” side bar includes build targets available.
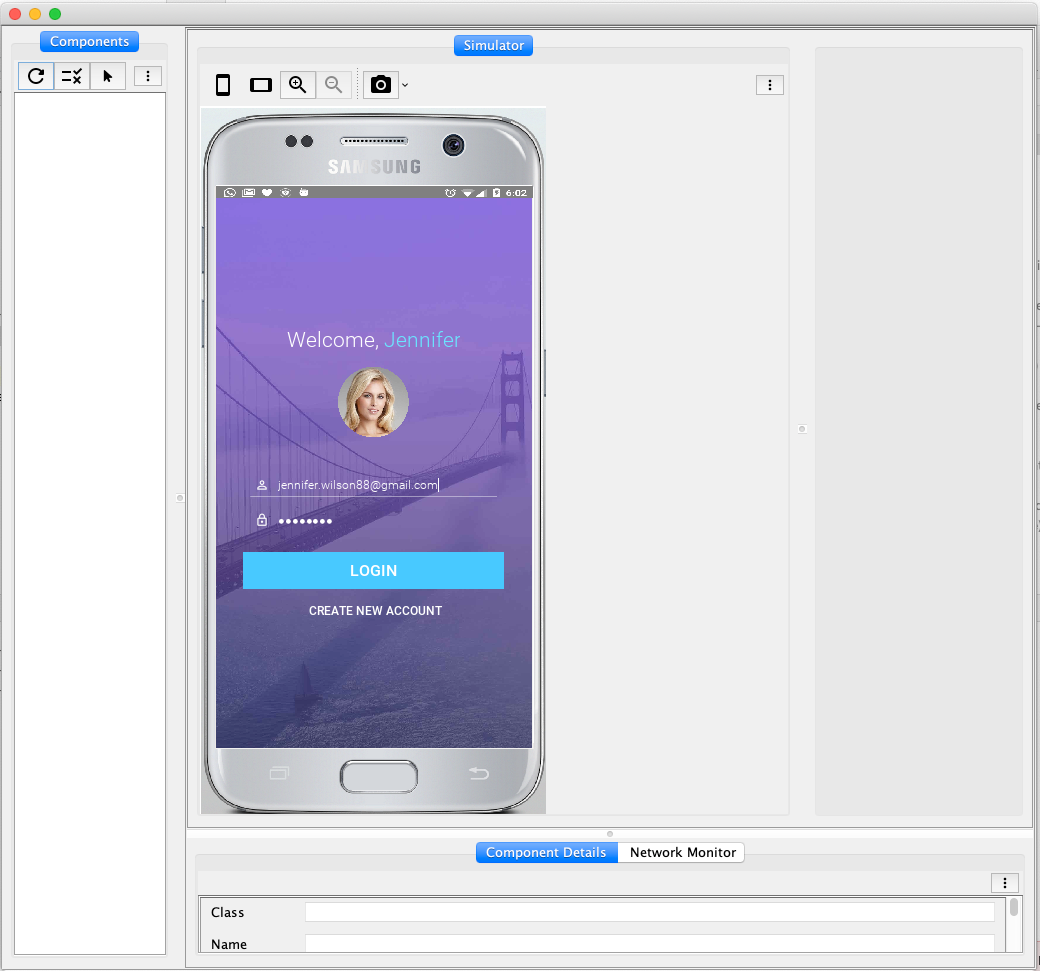
You should also see these build targets listed in the “Run” menu on the toolbar. “Run in Simulator” will be selected by default. If you press the “Run” button on the toolbar, it should launch the project in the simulator as shown below:
References
For more information about Codename One’s Maven support, see the Codename One Maven developers guide.
You might also check out the Bare-bones project getting started tutorial for an introduction to working with Maven projects.
Archived Comments
This post was automatically migrated from the legacy Codename One blog. The original comments are preserved here for historical context. New discussion happens in the Discussion section below.
Bryan Buchanan — June 10, 2022 at 7:48 am (permalink)
Bryan Buchanan says:
Excellent tool. Works really well.
Discussion
Join the conversation via GitHub Discussions.