Codename One integrates many built-in monetization options such as in-app purchases and subscriptions. Advertising is covered in its own chapter; see Advertising.
Many monetization options are available as third-party cn1libs that you can install through the Codename One website.
In-app purchase
In-app purchase is a helpful way to make app development profitable. Codename One supports in-app purchases of consumable and non-consumable products on Android and iOS. It also supports subscriptions. Even though the concept is simple, in-app purchase involves many moving parts, for subscriptions.
The SKU
In-app purchase support centers around the set of SKUs you want to sell. Each product, whether it’s a one-month subscription, an upgrade to the "Pro" version, or "10 disco credits," has a SKU (stock-keeping unit). Ideally, you can use the same SKU across every store that sells your app.
Types of products
Four classifications for products exist:
Non-consumable Product - This is a product that the user purchases once to "own." They can’t re-buy it. One example is a product that upgrades your app to a "Pro" version.
Consumable Product - This is a product that the user can buy more than once. For example, you might have a product for "10 Credits" that lets the user buy items in a game.
Non-Renewable Subscription - A subscription that you buy once, and won’t be "auto-renewed" by the app store. These are almost identical to consumable products, except that subscriptions need to be transferable across all the user’s devices. This means that non-renewable subscriptions require that you have a server that keeps track of the subscriptions.
Renewable Subscriptions - A subscription that the app store manages. The user will be automatically billed when the subscription period ends, and the subscription will renew.
The "hello world" of in-app purchase
Start with a simple example of an app that sells Worlds. First, pick the SKU for the product. Here you use com.codename1.world:
public static final String SKU_WORLD = "com.codename1.world";
UA8879.Next, the app’s main class needs to implement the PurchaseCallback interface
Using these callbacks, the app receives notifications whenever a purchase changes. For this simple app, only itemPurchased() and itemPurchaseError() matter. The legacy itemRefunded(), subscriptionStarted(), and subscriptionCanceled() hooks are deprecated in the core API and are no longer dispatched by the stores. Instead of relying on callbacks for long-term entitlement state, query the current receipts at runtime with helpers such as Purchase.wasPurchased(…), Purchase.isSubscribed(…), or Purchase.getReceipts(). That keeps the UI aligned with the latest data from the underlying store.
Now in the start() method, add a button that lets the user buy the world:
public void start() {
if(current!= null){
current.show();
return;
}
Form hi = new Form("Hi World");
Button buyWorld = new Button("Buy World");
buyWorld.addActionListener(e->{
if (Purchase.getInAppPurchase().wasPurchased(SKU_WORLD)) {
Dialog.show("can't Buy It", "You already Own It", "OK", null);
} else {
Purchase.getInAppPurchase().purchase(SKU_WORLD);
}
});

hi.addComponent(buyWorld);
hi.show();
}
At this point, the app can track the sale of the world. To make it more useful, add ToastBar feedback for purchase completion:
@Override
public void itemPurchased(String sku) {
ToastBar.showMessage("Thanks. You now own the world", FontImage.MATERIAL_THUMB_UP);
}

@Override
public void itemPurchaseError(String sku, String errorMessage) {
ToastBar.showErrorMessage("Failure occurred: "+errorMessage);
}
When the app first opens you see your button:
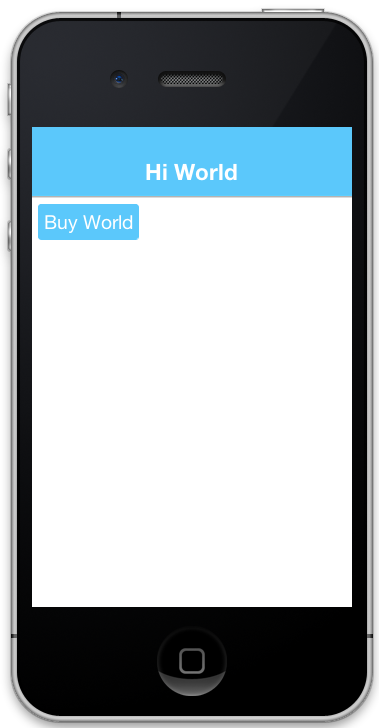
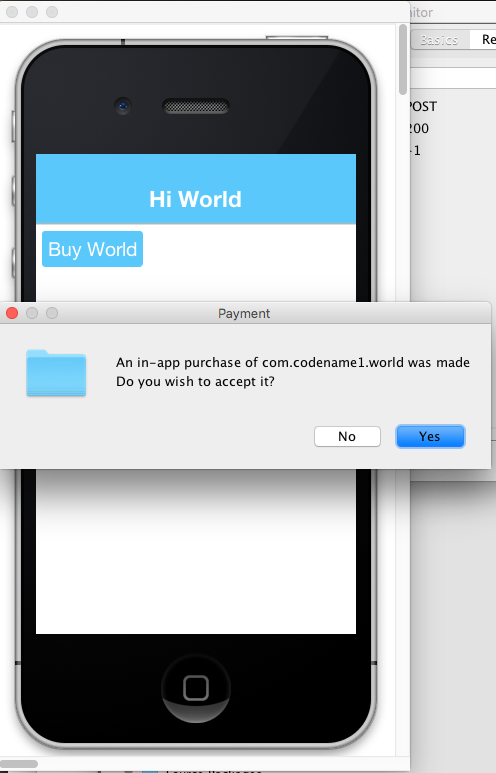
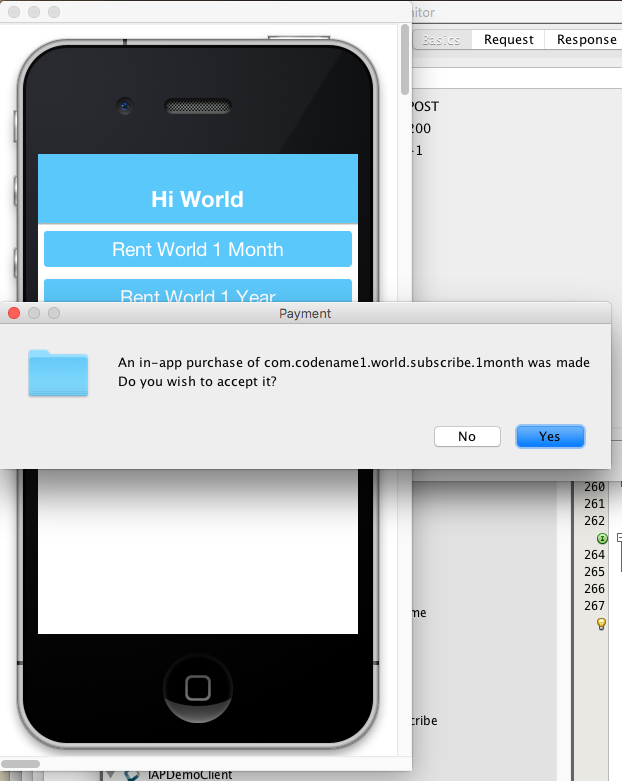
In the simulator, clicking on the "Buy World" button will bring up a prompt to ask you if you want to approve the purchase.
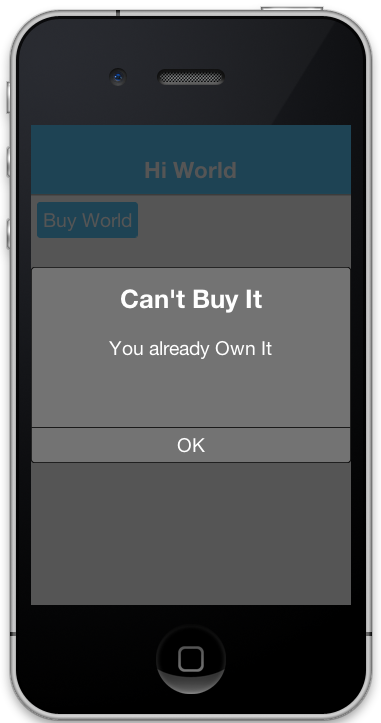
Now if you try to buy the product again, it pops up the dialog to let you know that you already own it.
Making it consumable
In the "Buy World" example above, the "world" product was non-consumable, since you could only buy the world once. You could change it to a consumable product by disregarding whether it was purchased before & keeping track of how many times it had been purchased.
You’ll use storage to keep track of the number of worlds that the user purchased. You need two methods to manage this count. One method gets the number of worlds that you own, and another adds a world to this count:
private static final String NUM_WORLDS_KEY = "NUM_WORLDS.dat";
public int getNumWorlds() {
 synchronized (NUM_WORLDS_KEY) {
 Storage s = Storage.getInstance();
 if (s.exists(NUM_WORLDS_KEY)) {
 return (Integer)s.readObject(NUM_WORLDS_KEY);
 } else {
 return 0;
 }
 }
}

public void addWorld() {
 synchronized (NUM_WORLDS_KEY) {
 Storage s = Storage.getInstance();
 int count = 0;
 if (s.exists(NUM_WORLDS_KEY)) {
 count = (Integer)s.readObject(NUM_WORLDS_KEY);
 }
 count++;
 s.writeObject(NUM_WORLDS_KEY, new Integer(count));
 }
}
Now you’ll change your buy code as follows:
buyWorld.addActionListener(e->{
 if (Dialog.show("Confirm", "You own "+getNumWorlds()+
 " worlds. Do you want to buy another one?", "Yes", "No")) {
 Purchase.getInAppPurchase().purchase(SKU_WORLD);
 }
});
And your itemPurchased() callback will need to add a world:
@Override
public void itemPurchased(String sku) {
 addWorld();
 ToastBar.showMessage("Thanks. You now own "+getNumWorlds()+" worlds", FontImage.MATERIAL_THUMB_UP);
}
Non-Renewable subscriptions
As you discussed before, there are two types of subscriptions:
Non-renewable
Auto-renewable
Non-renewable subscriptions are the same as consumable products, except that they’re shareable across devices. Auto-renewable subscriptions will continue as long as the user doesn’t cancel the subscription. They will be re-billed automatically by the appropriate app-store when the chosen period expires, and the app-store handles the management details itself.
Purchase class includes both a purchase() method and a subscribe() method. On some platforms it makes no difference which one you use, but on Android it matters. If the product is set up as a subscription in Google Play, then you must use subscribe() to buy the product. If it’s set up as a regular product, then you must use purchase(). Since you enter "Non-renewable" subscriptions as regular products in the play store, you would use the purchase() method.Promotional offers (iOS)
Apple allows you to present discounted introductory pricing to existing subscribers via promotional offers. Codename One surfaces this capability through overloads of both Purchase.purchase(String, PromotionalOffer) and Purchase.subscribe(String, PromotionalOffer), which forward the promotional context to StoreKit when you start the transaction. Promotional offers are only honoured by iOS, so the overloads fall back to the regular buy flow on other platforms.
To build the signed discount payload required by Apple you can use the ApplePromotionalOffer helper:
ApplePromotionalOffer offer = new ApplePromotionalOffer();
offer.setOfferIdentifier("my-intro-offer");
offer.setKeyIdentifier("A1B2C3D4");
// The nonce is one of the values your server signs, so it has to be
// the very one that produced the signature below. A fresh value
// generated here would never validate.
offer.setNonce(nonceFromYourServer);
offer.setSignature(signatureFromYourServer);
offer.setTimestamp(timestampFromYourServer);

Purchase purchase = Purchase.getInAppPurchase();
purchase.subscribe(SKU_WORLD_MONTHLY, offer);
Apple generates the signature and timestamp from your App Store Connect server notifications endpoint; Codename One passes them to the native StoreKit APIs. For one-time products you can call purchase(sku, offer) instead of subscribe(…).
Restoring purchases and managing subscriptions
Both Apple and Google provide built-in user interfaces for restoring past purchases and managing subscription billing preferences. Codename One exposes these entry points so you can surface the native flows without reimplementing them yourself.
Restores: Call
Purchase.isRestoreSupported()before presenting a "Restore purchases" button. When supported (iOS implements this natively), invokePurchase.restore()to prompt the operating system to re-deliver past transactions. Your app should implementRestoreCallback(like how you implementPurchaseCallback) so you can respond to individualitemRestored(…)events and to the completion or failure of the restore request.Subscription management: Use
Purchase.isManageSubscriptionsSupported()to detect whether the platform can show the subscription management UI. When it returnstrue, callingPurchase.manageSubscriptions(null)opens the store-specific settings screen (Apple’s subscription center on iOS and Google Play’s subscription management activity on Android). On Android you can optionally pass a SKU to deep-link directly to the plan the user should manage.
Because these flows are handled by the underlying store your UI doesn’t need to rebuild any billing screens. Gate the buttons on the capability checks above so that iOS and Android users get the familiar restore/manage dialogs while other platforms can fall back to your own help copy.
The Server-Side
Since a subscription purchased on one user device needs to be available across the user’s devices (Apple’s rules for non-renewable subscriptions), your app will need to have a server-component. In this section, you’ll gloss over that & "mock" the server interface. You’ll go into the specifics of the server-side below.
The receipts API
Subscriptions, in Codename One use the "Receipts" API. It’s up to you to register a receipt store with the in-app purchase instance, which allows Codename one to load receipts (from your server), and submit new receipts to your server. A Receipt includes information such as:
Store code (since you may be dealing with receipts from itunes, google play & Microsoft)
SKU
Transaction ID (store specific)
Expiry Date
Cancellation date
Buy date
Order Data (that you can use on the server-side to verify the receipt and load receipt details directly from the store it originated from).
The Purchase provides a set of methods for interacting with the receipt store, such as:
isSubscribed([skus])- Checks to see if the user is subscribed to any of the provided skus.getExpiryDate([skus])- Checks the expiry date for a set of skus.synchronizeReceipts()- Synchronizes the receipts with the receipt store. This will try to submit any pending purchase receipts to the receipt store, and the reload receipts from the receipt store.
In order for any of this to work, you must implement the ReceiptStore interface, and register it with the Buy instance. Your receipt store must implement two methods:
fetchReceipts(SuccessCallback<Receipt[]> callback)- Loads all the receipts from your receipt store for the current user.submitReceipt(Receipt receipt, SuccessCallback<Boolean> callback)- Submits a receipt to your receipt store. This gives you an opportunity to add details to the receipt such as an expiry date.
The "hello world" of Non-Renewable subscriptions
You’ll expand on the theme of "Buying" the world for this app, except, this time you will "Rent" the world for a period of time. You’ll have two products:
A 1-month subscription
A 1-year subscription
Every listing in the rest of this chapter uses these declarations:
static final String SKU_WORLD_1_MONTH = "com.codename1.world.month";
static final String SKU_WORLD_1_YEAR = "com.codename1.world.year";

// Both periods of the same subscription group. Every Purchase method that
// asks about status or expiry takes the whole group, so keeping them in
// one array is what makes the later listings read the way they do.
static final String[] PRODUCTS = { SKU_WORLD_1_MONTH, SKU_WORLD_1_YEAR };

// There is deliberately no Purchase field here. Receipts are cached on the
// instance and loaded from storage the first time one is asked for, while
// the synchronization that refreshes them is static and may be running on
// an instance the port created. A held instance therefore keeps answering
// from the snapshot it loaded; a fresh getInAppPurchase() reads what the
// last completed synchronization persisted. It is a storage read, not a
// network call.
Notice that you create two separate SKUs for the 1 month and 1-year subscription. Each subscription period must have its own SKU. The example uses an array (PRODUCTS) that contains both of the SKUs. This is handy, as you’ll see in the examples ahead, because the APIs for checking status and expiry date of a subscription take the SKUs in a "subscription group" as input.
It’s up to you to know the grouping of your SKUs. Any methods in the Purchase class that check subscription status or expiry date of a SKU should be passed all SKUs of that subscription group. For example, If you want to know if the user is subscribed to the SKU_WORLD_1_MONTH subscription, it would not be enough to call iap.isSubscribed(SKU_WORLD_1_MONTH), because that wouldn’t consider if the user had purchased 1-year subscription. The correct way is to always call iap.isSubscribed(SKU_WORLD_1_MONTH, SKU_WORLD_1_YEAR), or iap.isSubscribed(PRODUCTS) since you have placed both SKUs into your PRODUCTS array.
Implementing the receipt store

A basic receipt store needs to implement just two methods:
fetchReceiptssubmitReceipt
You’ll register it in your app’s init() method so that it’s always available:
public void init(Object context) {
// ...

 Purchase.getInAppPurchase().setReceiptStore(new ReceiptStore() {

 @Override
 public void fetchReceipts(SuccessCallback<Receipt[]> callback) {
 // Fetch receipts from storage and pass them to the callback
 }

 @Override
 public void submitReceipt(Receipt receipt, SuccessCallback<Boolean> callback) {
 // Save a receipt to storage. Make sure to call callback when done.
 }
 });
}
These methods are designed to be asynchronous since real-world apps will always be connecting to some sort of network service. Instead of returning a value, both of these methods are passed instances of the SuccessCallback class. It’s important to make sure to call callback.onSuccess() ALWAYS when the methods have completed, even if there is an error, or the Buy class will just assume that you’re taking a long time to complete the task, and will continue to wait for you to finish.
Once implemented, your fetchReceipts() method will look like:
// static declarations used by receipt store

// Storage key where list of receipts are stored
private static final String RECEIPTS_KEY = "RECEIPTS.dat";

@Override
public void fetchReceipts(SuccessCallback<Receipt[]> callback) {
 Storage s = Storage.getInstance();
 Receipt[] found;
 synchronized(RECEIPTS_KEY) {
 // readObject() answers null when the entry cannot be read or
 // deserialized, and Purchase calls this from inside loadReceipts(), so
 // throwing would leave synchronization marked in progress for the rest of
 // the session. Answering with an empty array is worse still: loadReceipts
 // persists a non-null result, so it would overwrite the receipts already
 // known and revoke a live subscription. null fails the fetch and leaves
 // them untouched, and only a genuinely absent entry is empty.
 boolean entryExists = s.exists(RECEIPTS_KEY);
 Object raw = entryExists ? s.readObject(RECEIPTS_KEY) : null;
 if (raw instanceof List) {
 // Checking the container is not checking its contents: a list holding
 // anything else -- a key collision, an older schema, a partial write --
 // makes toArray throw ArrayStoreException, which never reaches the
 // callback and leaves synchronization stuck for the session. Copy
 // element by element and fail the fetch if one does not belong.
 List<?> stored = (List<?>) raw;
 Receipt[] copy = new Receipt[stored.size()];
 int i = 0;
 for (Object o : stored) {
 if (!(o instanceof Receipt)) {
 copy = null;
 break;
 }
 copy[i++] = (Receipt) o;
 }
 found = copy;
 } else if (entryExists) {
 found = null;
 } else {
 found = new Receipt[0];
 }
 }
 // Make sure this is outside the synchronized block
 callback.onSucess(found);
}
This is straight forward. You’re checking to see if you already have a list of receipts stored. If so you return that list to the callback. If not you return an empty array of receipts.
Receipt implements Externalizable so you are able to write instances directly to Storage.The submitReceipt() method is a little more complex, as it needs to calculate the new expiry date for your subscription:
@Override
public void submitReceipt(Receipt receipt, SuccessCallback<Boolean> callback) {
 Storage s = Storage.getInstance();
 boolean stored;
 synchronized(RECEIPTS_KEY) {
 // readObject() answers null when the entry cannot be read or
 // deserialized, and this runs inside synchronizeReceipts(), so throwing
 // would leave synchronization marked in progress for the rest of the
 // session. An unreadable entry is not an empty one, though: carrying on
 // as if it were would write this single receipt over every receipt the
 // user has already paid for. Report failure and write nothing, and
 // Purchase keeps the receipt pending and retries later.
 boolean entryExists = s.exists(RECEIPTS_KEY);
 Object raw = entryExists ? s.readObject(RECEIPTS_KEY) : null;
 if (entryExists && !(raw instanceof List)) {
 callback.onSucess(Boolean.FALSE);
 return;
 }
 // The container's type says nothing about its elements, and iterating a
 // list holding something else throws before the callback runs, which
 // leaves synchronization stuck for the session. Copy with a check, the
 // same way fetchReceipts() does.
 List<Receipt> receipts = new ArrayList<Receipt>();
 if (raw instanceof List) {
 for (Object o : (List<?>) raw) {
 if (!(o instanceof Receipt)) {
 callback.onSucess(Boolean.FALSE);
 return;
 }
 receipts.add((Receipt) o);
 }
 }
 // Check to see if this receipt already exists. That should not happen,
 // but a store can resend one.
 for (Receipt r : receipts) {
 if (sameReceipt(r, receipt)) {
 // Already stored. Report success, or synchronizeReceipts() never finishes.
 callback.onSucess(Boolean.TRUE);
 return;
 }
 }

 // Now try to find the current expiry date
 Date currExpiry = new Date();
 List<String> lProducts = Arrays.asList(PRODUCTS);
 for (Receipt r : receipts) {
 if (!lProducts.contains(r.getSku())) {
 continue;
 }
 if (r.getCancellationDate()!= null) {
 continue;
 }
 if (r.getExpiryDate() == null) {
 continue;
 }
 if (r.getExpiryDate().getTime() > currExpiry.getTime()) {
 currExpiry = r.getExpiryDate();
 }
 }

 // Now set the appropriate expiry date by adding time onto
 // the end of the current expiry date
 Calendar cal = Calendar.getInstance();
 cal.setTime(currExpiry);
 Date newExpiry = null;
 if (SKU_WORLD_1_MONTH.equals(receipt.getSku())) {
 cal.add(Calendar.MONTH, 1);
 newExpiry = cal.getTime();
 } else if (SKU_WORLD_1_YEAR.equals(receipt.getSku())) {
 cal.add(Calendar.YEAR, 1);
 newExpiry = cal.getTime();
 }

 // Purchase submits every receipt to the store, including products outside
 // this subscription group. Only the subscription SKUs get an expiry date:
 // stamping a consumable or a one-off purchase with the subscription's
 // expiry would make isSubscribed() report it as an active subscription.
 if (newExpiry != null) {
 receipt.setExpiryDate(newExpiry);
 }
 receipts.add(receipt);
 stored = s.writeObject(RECEIPTS_KEY, receipts);

 }
 // Make sure this is outside the synchronized block. Report what the
 // write actually did: on a failure Purchase would otherwise record the
 // transaction as processed and drop it from the pending queue, losing a
 // receipt the user paid for.
 callback.onSucess(stored);
}

// Two receipts are the same purchase when they come from the same store
// and carry the same transaction id. The store code is part of that
// identity because a transaction id is only unique within its own store,
// as Receipt#getTransactionId() says. A null transaction id is not an
// identity either: two distinct receipts can both carry one, so fall back
// to the fields that together identify a purchase.
//
// Purchase.receiptsMatch() compares one device's pending queue, where
// every receipt comes from the same store, so it can lean on the
// transaction id alone. A ReceiptStore holds receipts from every store
// and cannot.
private static boolean sameReceipt(Receipt a, Receipt b) {
 if (!Objects.equals(a.getStoreCode(), b.getStoreCode())) {
 return false;
 }
 String aTx = a.getTransactionId();
 String bTx = b.getTransactionId();
 if (aTx != null && bTx != null) {
 return aTx.equals(bTx);
 }
 if (aTx != null || bTx != null) {
 return false;
 }
 return Objects.equals(a.getSku(), b.getSku())
 && Objects.equals(a.getPurchaseDate(), b.getPurchaseDate())
 && Objects.equals(a.getOrderData(), b.getOrderData());
}
The main logic of this method involves iterating through all the existing receipts to find the latest current expiry date, so that when the user purchases a subscription, it’s added onto the end of the current subscription (if one exists) rather than going from today’s date. This enables users to renew their subscription before the subscription has expired.
In the real-world, you would implement this logic on the server-side.
submitReceipt method. Non-renewable subscriptions are essentially no different than regular consumable products. It’s up to you to manage the subscription logic - and Apple, in particular, requires you to do so using a server.Synchronizing receipts
In order for your app to provide you with current data about the user’s subscriptions and expiry dates, you need to synchronize the receipts with your receipt store. Purchase provides a set of methods for doing this. You’ll call one of them inside the start() method, and you may resynchronize at other strategic times if you suspect that the information may have changed.
The following methods can be used for synchronization:
synchronizeReceipts()- Asynchronously synchronizes receipts in the background. You won’t be notified when it’s complete.synchronizeReceipts(final long ifOlderThanMs, final SuccessCallback<Boolean> callback)- Asynchronously synchronizes receipts, but only if they haven’t been synchronized in the specified time. For example, In your start() method you might decide that you only want to synchronize receipts once per day. This also includes a callback that will be called when synchronization is complete.synchronizeReceiptsSync(long ifOlderThanMs)- Synchronously synchronizes receipts, blocking until it’s complete, and will only refetch if data is older than the given time (pass0to always refetch). This is safe to use on the EDT as it employsinvokeAndBlockunder the covers.
In your hello world app you synchronize the subscriptions in a few places.
In the start() method, after the form is built:
public void start() {
 if (current != null) {
 // A resume. The form and everything on it survived, so rebuilding it
 // would hand a second form components the first one still owns, which
 // Container rejects.
 current.show();
 } else {
 Form hi = new Form("Hello World", BoxLayout.y());

 // ... the rest of the form

 // The expiry label and the button that refreshes it, both of which
 // the next two listings build.
 addExpiryLabel(hi);
 addSyncButton(hi);

 current = hi;
 hi.show();
 }

 // Outside the branch on purpose: a subscription can be bought, renewed
 // or cancelled on another device while this one is suspended, so the
 // resume needs this as much as the launch does.
 Purchase.getInAppPurchase().synchronizeReceipts(0, success -> {
     // Whatever this brought back, the expiry label is now out of date.
     // Repaint it from the same method the manual button uses.
     if (success) {
         showRentalStatus();
         current.revalidate();
     }
 });
}
And you also provide a button to allow the user to manually synchronize the receipts:
void addSyncButton(Form hi) {
    Button syncReceipts = new Button("Synchronize Receipts");

    syncReceipts.addActionListener(e -> {
        Purchase.getInAppPurchase().synchronizeReceipts(0, success -> {
            // synchronizeReceipts reports true only when every pending
            // purchase reached the receipt store AND the receipts came
            // back. On false nothing was reloaded, so there is nothing
            // new to show and the status on screen stays as it was.
            if (success) {
                showRentalStatus();
                hi.revalidate();
            } else {
                ToastBar.showErrorMessage("Could not reach the receipt store");
            }
        });
    });

    hi.add(syncReceipts);
}
Expiry dates and subscription status
Now that you have a receipt store registered, and you have synchronized your receipts, you can query the Purchase instance to see if a SKU or set of SKUs is subscribed. Three useful methods in this realm:
boolean isSubscribed(String… skus)- Checks to see if the user is subscribed to any of the provided SKUs.Date getExpiryDate(String… skus)- Gets the latest expiry date of a set of SKUs.Receipt getFirstReceiptExpiringAfter(Date dt, String… skus)- This method will return the earliest receipt with an expiry date after the given date. This is needed in cases where you need to decide if the user should have access to some content based on its publication date. For example, If you published an issue of your e-zine on March 1, and the user purchased a subscription on March 15th, then they should get access to the March 1st issue even though it doesn’t necessarily fall in the subscription period. Being able to fetch the first receipt after a given date makes it easier to determine if a particular issue should be covered by a subscription.
If you need to know more information about subscriptions, you can always just call getReceipts() to get a list of all the current receipts and determine for yourself what the user should have access to.
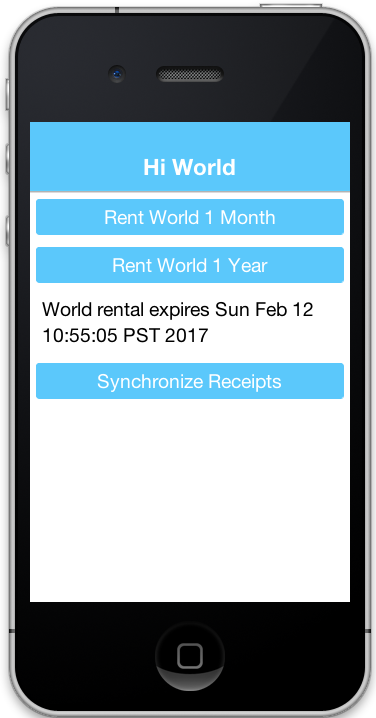
In the hello world app you’ll use this information in a few different places. On your main form you’ll include a label showing the current expiry date, painted from the receipts already on the device and repainted by whichever of the two synchronizations above comes back first:
// A field, not a local: the synchronization at the end of start() and the
// button above both have to reach this label.
SpanLabel rentalStatus = new SpanLabel();

void addExpiryLabel(Form hi) {
    // The receipts already on the device answer this with no round trip,
    // so the label is right the moment the form appears rather than after
    // the first synchronization comes back.
    showRentalStatus();
    hi.add(rentalStatus);
}

void showRentalStatus() {
    Purchase iap = Purchase.getInAppPurchase();
    if (iap.isSubscribed(PRODUCTS)) {
        rentalStatus.setText("World rental expires " + iap.getExpiryDate(PRODUCTS));
    } else {
        rentalStatus.setText("You do not currently have a subscription to the world");
    }
}
Allowing the user to purchase the subscription
You should now have all the background required to implement the Hello World Subscription app. You’ll return to the code and see how the user purchases a subscription.
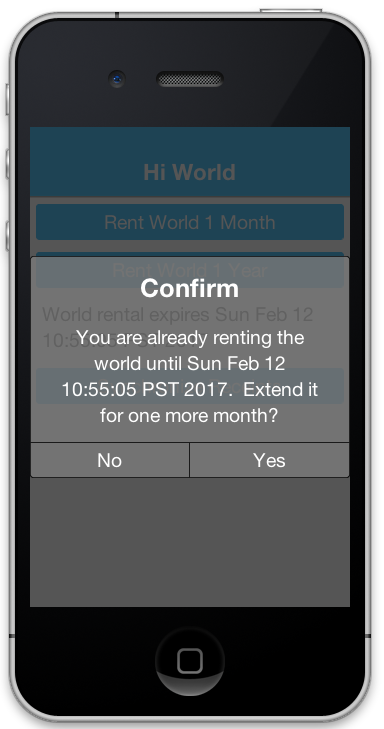
In the main form, you want two buttons to subscribe to the World, for one month and one year respectively. They look like:
// A fresh Purchase on every click, never one captured by the
// listener: receipts are cached per instance, so a captured one keeps
// answering from before the purchase the user just made.
//...
Button rentWorld1M = new Button("Rent World 1 Month");
rentWorld1M.addActionListener(e->{
 String msg = null;
 Purchase iap = Purchase.getInAppPurchase();
 if (iap.isSubscribed(PRODUCTS)) { // (1)
 msg = "you're already renting the world until "
 +iap.getExpiryDate(PRODUCTS) // (2)
 +". Extend it for one more month?";
 } else {
 msg = "Rent the world for 1 month?";
 }
 if (Dialog.show("Confirm", msg, "Yes", "No")) {
 iap.purchase(SKU_WORLD_1_MONTH); // (3)
 // Note: since this is a non-renewable subscription it's a regular
 // product in the play store - therefore you use the purchase() method.
 // If it were a "subscription" product in the play store, then you
 // would use subscribe() instead.
 }
});

Button rentWorld1Y = new Button("Rent World 1 Year");
rentWorld1Y.addActionListener(e->{
 String msg = null;
 Purchase iap = Purchase.getInAppPurchase();
 if (iap.isSubscribed(PRODUCTS)) {
 msg = "you're already renting the world until "+
 iap.getExpiryDate(PRODUCTS)+
 ". Extend it for one more year?";
 } else {
 msg = "Rent the world for 1 year?";
 }
 if (Dialog.show("Confirm", msg, "Yes", "No")) {
 iap.purchase(SKU_WORLD_1_YEAR);
 // Note: since this is a non-renewable subscription it's a regular
 // product in the play store - therefore you use the purchase() method.
 // If it were a "subscription" product in the play store, then you
 // would use subscribe() instead.
 }
});
In the event handler you check if the user is subscribed by calling
isSubscribed(PRODUCTS). Notice that you check it against the array of both the one month and one year subscription SKUs.You are able to tell the user when the current expiry date is so that they can gauge whether to proceed.
Since this is a non-renewable subscription, you use the
Purchase.purchase()method. See following note aboutsubscribe()vspurchase()
Subscribe() vs purchase()
The Purchase class includes two methods for initiating a purchase:
purchase(sku)subscribe(sku)
Which one you use depends on the type of product that’s being purchased. If your product is set up as a subscription in the Google Play Store, then you should use subscribe(sku). Otherwise, you should use purchase(sku).
Handling purchase callbacks
The buy callbacks are like the ones implemented in the regular in-app purchase examples:
@Override
public void itemPurchased(String sku) {
 // Nothing reads receipts off this instance until after the call below,
 // so its cache loads from storage once the synchronization has written
 // there -- which is the point of not holding a Purchase around.
 Purchase iap = Purchase.getInAppPurchase();

 // Reload the receipts from the store. This answers false when the receipt
 // could not be submitted or fetched, and the receipt then stays pending --
 // so the expiry date below would be stale, or the epoch. Do not announce a
 // success that did not happen.
 if (!iap.synchronizeReceiptsSync(0)) {
 ToastBar.showErrorMessage("Could not confirm the purchase yet -- it will retry.");
 return;
 }
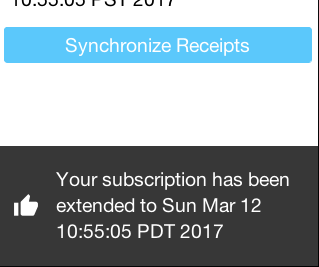
 ToastBar.showMessage("Your subscription has been extended to "+iap.getExpiryDate(PRODUCTS), FontImage.MATERIAL_THUMB_UP);

 // The form the user is looking at still shows the status from before the
 // purchase. The toast is not a substitute for repainting it.
 //
 // iOS registers its StoreKit observer during initialization, so an
 // unfinished transaction can be re-delivered here before start() has
 // built the form. The label is a field and is safe to set; the form may
 // not exist yet, and start() paints it from the same method anyway.
 showRentalStatus();
 if (current != null) {
 current.revalidate();
 }
}

@Override
public void itemPurchaseError(String sku, String errorMessage) {
 ToastBar.showErrorMessage("Failure occurred: "+errorMessage);
}
Notice that, in itemPurchased() you don’t need to explicitly create any receipts or submit anything to the receipt store. This is handled for you automatically. You do make a call to synchronizeReceiptsSync(0) but this is just to ensure that your toast message has the new expiry date loaded already.
Screenshots
Summary
This section demonstrated how to set up an app to use non-renewable subscriptions using in-app purchase. Non-renewable subscriptions are the same as regular consumable products except for the fact that they’re shared by all the user’s devices, and thus, require a server component. The app store has no knowledge of the duration of your non-renewable subscriptions. It’s up to you to specify the expiry date of purchased subscriptions on their receipts when they’re submitted. Google play doesn’t formally have a "non-renewable" subscription product type. To implement them in Google play, you would just set up a regular product. It’s how you handle it internally that makes it a subscription, and not just a regular product.
Codename One uses the Receipt class as the foundation for its subscriptions infrastructure. You, as the developer, are responsible for implementing the ReceiptStore interface to provide the receipts. The Purchase instance will load receipts from your ReceiptStore, and use them to determine whether the user is subscribed to a subscription, and when the subscription expires.
Auto-Renewable subscriptions
Auto-renewable subscriptions provide, arguably, an easier path to recurring revenue than non-renewable subscriptions because all the subscription stuff is handled by the app store. You defer almost entirely to the app store (iTunes for iOS, and Play for Android) for billing and management.
If there is a down-side, it would be that you are also subject to the rules of each app store - and they take their cut of the revenue.
For more information about Apple’s auto-renewable subscription features and rules see this document.
For more information about subscriptions in Google play, see this document.
Auto-Renewable vs Non-Renewable: Choosing between them
When deciding between auto-renewable and non-renewable subscriptions, as always, the answer will depend on your needs and preferences. Auto-renewables are nice because it takes the process out of your hands. You just get paid. On the other hand, there are valid reasons to want to use non-renewables. For example, You can’t cancel an auto-renewable subscription for a user. They have to do that themselves. You may also want more control over the subscription and renewal process, in which case a non-renewable might make more sense.
On a practical level, if you are using auto-renewable subscriptions (and so subscription products in the Google Play Store) you must use the Purchase.subscribe(sku) method for initiating the purchase workflow. For non-renewable subscriptions (and so regular products in the Google Play Store), you must use the Purchase.purchase(sku) method.
Learning by example
In this section you’ll describe the general workflow of subscription management on the server. You also show how use Apple’s and Google’s web services to check receipts and stay informed of important events (such as when users cancel or renew their subscriptions).
Building the IAP demo project
A complete demo exists as two projects: a client app and a server app.
The client. The link is a single source file rather than a project, so create a
Codename One project and paste it into your main class, adjusting the package and
class name to match. It uses RESTfulWebServiceClient, which isn’t part of the
core API, so add the
Generic Web Service Client
cn1lib as a dependency — see How to use cn1libs.
Two things about reaching the server from a device. The client can’t talk to
http://localhost — on a device that name means the phone — so point it at the
address your machine has on the network:
private static final String localHost = "http://10.0.1.32";
And iOS refuses unencrypted HTTP by default, so a plain http:// address needs an
App Transport Security exception through the ios.plistInject build hint:
<key>NSAppTransportSecurity</key>
<dict>
    <key>NSAllowsArbitraryLoads</key>
    <true/>
</dict>The server. It needs a Java EE application server rather than a servlet
container: alongside its JAX-RS endpoints it uses a @Stateless bean and a
container-managed @Schedule job to revalidate subscriptions, and neither Tomcat
nor Jetty supplies those on its own.
Some of what it builds against isn’t published to a public repository, so the project ships a task that installs those artifacts into your local Maven repository. Run it once after cloning, before the first build:
$ git clone https://github.com/shannah/cn1-iap-demo-server
$ cd cn1-iap-demo-server
$ ant install-deps
ant, mvn and git on your PATH. Check the project’s
own README first in case it has moved on since — it’s the server’s build, not
Codename One’s.Create a database and a RECEIPTS table in it. The shape of that table is the
whole storage contract between the two halves:
create TABLE RECEIPTS
(
	TRANSACTION_ID VARCHAR(128) not null,
	USERNAME VARCHAR(64) not null,
	SKU VARCHAR(128) not null,
	ORDER_DATA VARCHAR(32000),
	PURCHASE_DATE BIGINT,
	EXPIRY_DATE BIGINT,
	CANCELLATION_DATE BIGINT,
	LAST_VALIDATED BIGINT,
	STORE_CODE VARCHAR(20) default '' not null,
	primary key (TRANSACTION_ID, STORE_CODE)
)
Then point the server’s persistence unit at that database, by setting the data
source in its persistence.xml to the one your application server exposes for
it. Creating the table isn’t enough on its own — until the persistence unit
names the right data source, the server’s EntityManager never reaches it.
Looking at the source of the app
Now that you’ve set up and built the app, take a look at the source code so you can see how it all works.
Client side
The example uses the Generic Webservice Client Library from inside your ReceiptStore implementation to load receipts from the web service, and insert new receipts to the database.
The full ReceiptStore implementation is in the client project linked above.
Notice that you aren’t doing any calculation of expiry dates in your client app, as you did in the previous post (on non-renewable receipts). Since you are using a server now, it makes sense to move all that logic over to the server.
Its createRESTClient() method builds a RESTfulWebServiceClient using basic authentication. The idea is that your user has logged into your app at some point, so you have a username and password to send along with the receipt data and can tie the subscription to an account.
Server-Side
On the server side the REST controller is a standard JAX-RS interface. Its ReceiptsFacadeREST class is in the server project linked above.
The magic happens inside that validateAndSaveReceipt() method, which You’ll cover in detail soon.
Notifications
It’s important to note that you won’t be notified by apple or google when changes are made to subscriptions. It’s up to you to periodically "poll" their web service to find if any changes have been made. Changes you would be interested in are primarily renewals and cancellations. Set up a method to run periodically (once per day might be enough), using the scheduling mechanism on your server stack.
That method finds all the receipts in the database that haven’t been validated in some period of time, and validates it. Again, the magic happens inside the validateAndSaveReceipt() method which you cover later.
The CN1-IAP-Validator library
For this tutorial, the example uses a purpose-built library to handle receipt validation in a way that hides as much of the complexity as possible. It supports both Google Play receipts and iTunes receipts.
The server project linked above shows it in use.
In that project the complexity of receipt validation is reduced to entering three configuration strings:
APPLE_SECRET- This is a "secret" string that you will get from iTunes connect when you set up your in-app products.GOOGLE_DEVELOPER_API_CLIENT_ID- A client ID that you’ll get from the Google developer API console when you set up your API service credentials.GOOGLE_DEVELOPER_PRIVATE_KEY- A PKCS8 encoded string with an RSA private key that you’ll receive at the same time as theGOOGLE_DEVELOPER_API_CLIENT_ID.
The next section walks through the steps to get these values.
The validateAndSaveReceipt() method
validateAndSaveReceipt() is where the work happens, and it’s worth reading in full in the server project linked above.
Receipts class and a Receipt class. This is slightly confusing. The Receipts class is a JPA entity the encapsulates a row from the "receipts" table of your SQL database. The Receipt class is com.codename1.payment.Receipt. It’s used to interface with the IAP validation library.Setting up the stores
Both stores need the same two things from you: the products themselves, and a credential your server can validate receipts with. The consoles that do it are Google’s and Apple’s, and both have been redesigned more than once, so follow their own documentation for the clicking — what matters here is what to end up with. Each step below links the vendor page that covers it.
Products. Create one product per SKU your app sells, and use exactly the ids
your code passes to purchase() and subscribe(). A subscription needs its own
SKU per period, which is why the examples above keep both in a PRODUCTS array
and pass the whole group to the status calls.
Google Play receipt validation. Server-side validation goes through the
Google Play
Developer API. Enable that API for the project, create a service account,
give it access to your Play account, and download its key. The key arrives as
JSON and its client_email and private_key are what your server
authenticates with:
{
 "type": "service_account",
 "project_id": "iapdemo-152500",
 "private_key_id": "1b1d39************7d839826b8a",
 "private_key": "-----BEGIN PRIVATE KEY-----... Some private key string -----END PRIVATE KEY-----\n",
 "client_email": "[email protected]",
 "client_id": "117601572633333082772",
 "auth_uri": "https://accounts.google.com/o/oauth2/auth",
 "token_uri": "https://accounts.google.com/o/oauth2/token",
 "auth_provider_x509_cert_url": "https://www.googleapis.com/oauth2/v1/certs",
 "client_x509_cert_url": "https://www.googleapis.com/robot/v1/metadata/x509/iapdemo%40iapdemo-152500.iam.gserviceaccount.com"
}
Apple receipt validation. Apple uses a shared secret generated alongside the in-app products rather than a service account:
public static final String APPLE_SECRET = "your-shared-secret-here";
Testing before either is ready. Both validations can be switched off so the receipt store accepts what the device reports, which is how you exercise the flow before the credentials exist. Turn them back on before you ship, because with them off the server trusts the client:
public static final boolean DISABLE_PLAY_STORE_VALIDATION=true;
public static final boolean DISABLE_ITUNES_STORE_VALIDATION=true;
Test accounts. Both stores let you nominate accounts that can buy without being charged — Apple’s sandbox and Google’s license testers. Apple’s sandbox works against a development-signed build installed straight onto a device, and Google’s license testers can buy from a sideloaded build once the package name and products match; it’s Play’s track-based testing that needs an uploaded artifact. Their docs cover the current mechanism, and Google’s has changed name twice.