There are many ways to animate and liven the data within a Codename One application, layout animations are probably chief among them. But first you need to understand some basics such as layout reflows.
Layout reflow
Layout in tools such as HTML is implicit, when you add something into the UI it’s automatically placed. Other tools such as Codename One use explicit layout, that means you’ve to explicitly request the UI to layout itself after making changes!
When adding a component to a UI that’s already visible, the component won’t show by default.
The chief advantage of explicit layout is performance.
For example, imagine adding 100 components to a form. If the form was laid out automatically, layout would have happened 100 times instead of once when adding was finished. In fact layout reflows are often considered the #1 performance issue for HTML/JavaScript applications.
That’s why, when you add components to a form that’s already showing, you should invoke revalidate() or animate the layout appropriately. This also enables the layout animation behavior explained below.
Layout animations
To understand animations you need to understand a couple of things about Codename One components. When you add a component to a container, it’s added but not positioned anywhere. A novice might notice the setX/setY/setWidth/setHeight methods on a component and try to position it.
This won’t work since these methods are meant for the layout manager, which is implicitly invoked when a form is shown (internally in Codename One). The layout manager uses these methods to position/size the components based on the hints given to it.
If you add components to a form that’s showing, it’s your responsibility to invoke revalidate/layoutContainer to arrange the newly added components (see Layout Reflows).
animateLayout() method is a fancy form of revalidate that animates the components into their laid out position. After changing the layout & invoking this method the components move to their new sizes/positions seamlessly. Form exposes convenience wrappers such as animateLayout*() that forward to the underlying content pane, so you can call the methods directly on the form unless you specifically need to animate a nested container.
This sort of behavior creates a special case where setting the size/position makes sense. When you set the size/position in the demo code here you’re positioning the components at the animation start position above the frame:
Form hi = new Form("Layout Animations", new BoxLayout(BoxLayout.Y_AXIS));
Button fall = new Button("Fall"); // (1)
fall.addActionListener((e) -> {
    for (int iter = 0; iter < 10; iter++) {
        Label b = new Label("Label " + iter);
        b.setWidth(fall.getWidth());
        b.setHeight(fall.getHeight());
        b.setY(-fall.getHeight());
        hi.add(b);
    }
    hi.animateLayout(20000); // (2)
});
hi.add(fall);
Notice these things about this example:
You used a button to do the animation rather than doing it on show. Since
show()implicitly lays out the components it wouldn’t have worked.You used
hi.animateLayout(20000);, which delegates to theFormcontent pane. If you need to animate a specific container (for example, a nested layout), callanimateLayout()on that container instead.
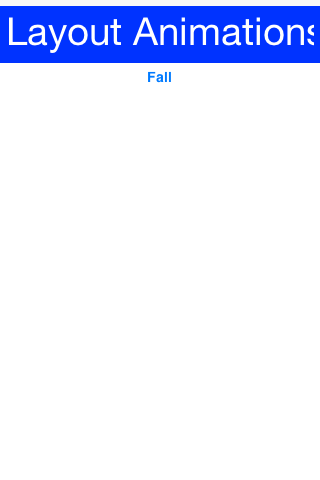
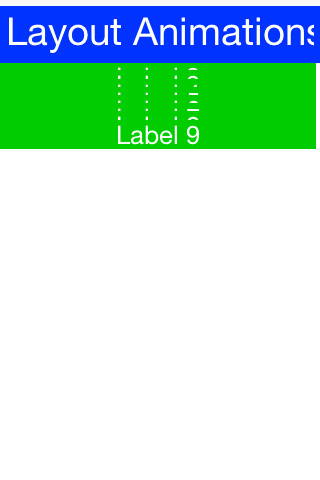
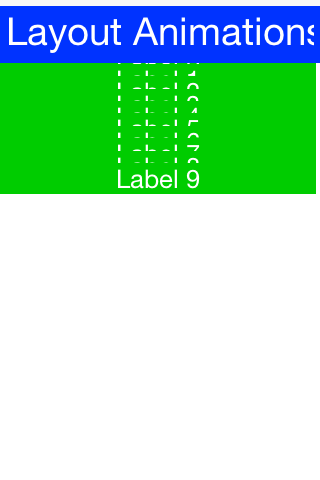
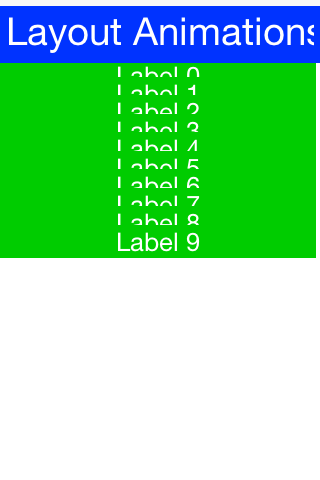
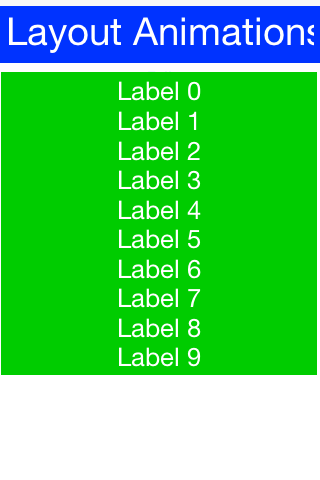
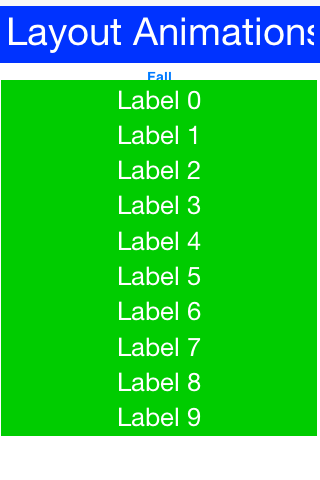
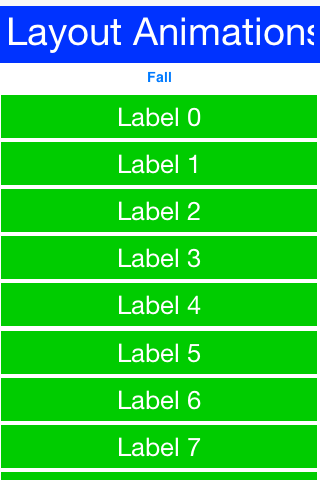
This results in:
Unlayout animations
While layout animations are powerful effects for adding elements into the UI and drawing attention to them. The inverse of removing an element from the UI is often more important. For example, when you delete or remove an element you want to animate it out.
Layout animations don’t do that since they will try to bring the animated item into place. The exact opposite of a layout animation is the "unlayout animation." Container.animateUnlayout(int, int, Runnable) and the Form.animateUnlayout*() helpers trigger this transition either asynchronously (with a completion callback) or synchronously via the AndWait variants.
The "unlayout animation" takes a valid laid out state and shifts the components to an invalid state that you defined in advance. For example, you can fix the example above to flip the "fall" button into a "rise" button when the buttons come into place and this will allow the buttons to float back up to where they came from in the exact reverse order.
Form hi = new Form("Layout Animations", new BoxLayout(BoxLayout.Y_AXIS));
Button fall = new Button("Fall");
fall.addActionListener((e) -> {
    if (hi.getContentPane().getComponentCount() == 1) {
        fall.setText("Rise");
        for (int iter = 0; iter < 10; iter++) {
            Label b = new Label("Label " + iter);
            b.setWidth(fall.getWidth());
            b.setHeight(fall.getHeight());
            b.setY(-fall.getHeight());
            hi.add(b);
        }
        hi.animateLayout(20000);
    } else {
        fall.setText("Fall");
        for (int iter = 1; iter < hi.getContentPane().getComponentCount(); iter++) { // (1)
            Component c = hi.getContentPane().getComponentAt(iter);
            c.setY(-fall.getHeight()); // (2)
        }
        hi.animateUnlayoutAndWait(20000, 255); // (3)
        hi.removeAll(); // (4)
        hi.add(fall);
        hi.revalidate();
    }
});
hi.add(fall);
You will notice some similarities with the unlayout animation but the differences represent the exact opposite of the layout animation:
You loop over existing components (not newly created ones)
You set the desired end position not the desired starting position
You used the
animateUnlayoutAndWait(…)variant to block until completion;animateUnlayout(duration, opacity, callback)provides the non-blocking alternative when you want to continue and run code from a callback instead.After the animation completes you need to actually remove the elements since the UI is now in an invalid position with elements outside of the screen but still physically there!
Hiding & visibility
A common trick for animating Components in Codename One is to set their preferred size to 0 and then invoke animateLayout() thus triggering an animation to hide said Component. several issues with this trick but one of the biggest ones is the fact that setPreferredSize has been deprecated for quite a while.
Instead of using that trick you can use setHidden/isHidden who effectively encapsulate this functionality and a bit more.
One of the issues setHidden tries to solve is the fact that preferred size doesn’t include the margin in the total and thus a component might still occupy space despite being hidden. When you request the margin change the current margins are cached, the component is given zero margins while hidden, and those cached values are restored when it’s shown again—without resetting the UIID or other style state.
This functionality might be undesirable which is why there is a version of the setHidden method that accepts a boolean flag indicating whether the margin cache should be manipulated. You can effectively hide/show a component without deprecated code using something like this:
Button toHide = new Button("Will Be Hidden");
Button hide = new Button("Hide It");
hide.addActionListener((e) -> {
    hide.setEnabled(false);
    boolean t = !toHide.isHidden();
    toHide.setHidden(t);
    toHide.getParent().animateLayoutAndWait(200);
    toHide.setVisible(!t);
    hide.setEnabled(true);
});
setVisible(), which shouldn’t be confused with setHidden. setVisible() toggles the visibility of the component it would still occupy the same amount of spaceSynchronicity in animations
Most animations have two or three variants:
Standard animation for example,
animateLayout(int)or the non-blockinganimateUnlayout(int, int, Runnable)And wait variant for example,
animateLayoutAndWait(int)/animateUnlayoutAndWait(int, int)Callback variant for example,
animateLayoutFade(int, int, Runnable)
The standard animation is invoked when you don’t care about the completion of the animation. You can do this for a standard animation.
The AndWait variant blocks the calling thread until the animation completes. This is useful for sequencing animations one after the other e.g this code from the kitchen sink demo:
arrangeForInterlace(effects);
effects.animateUnlayoutAndWait(800, 20);
effects.animateLayoutFade(800, 20);
First the UI goes through an "unlayout" animation, once that completes the layout itself is performed.
AndWait calls needs to be invoked on the Event Dispatch Thread despite being "blocking." This is a common convention in Codename One powered by a unique capability of Codename One: invokeAndBlock.You can learn more about
invokeAndBlock in the
EDT section.The callback variant is like the invokeAndBlock variant but uses a more conventional callback semantic which is more familiar to some developers. It accepts a Runnable callback that will be invoked after the fact. For example, you can change the unlayout call from before to use the callback semantics as such:
hi.animateUnlayout(20000, 255, () -> {
    hi.removeAll();
    hi.add(fall);
    hi.revalidate();
});
Animation fade and hierarchy
There are several more variations on the standard animate methods. Several methods accept a numeric fade argument. This is useful to fade out an element in an "unlayout" operation or fade in a regular animation.
The value for the fade argument is a number between 0 and 255 where 0 represents full transparency and 255 represents full opacity.
Some animate layout methods are hierarchy based. They work like the regular animateLayout methods but recurse into the entire Container hierarchy. These methods work well when you have components in a nested hierarchy that need to animate into place. This is demonstrated in the opening sequence of the kitchen sink demo:
for(int iter = 0 ; iter < demoComponents.size() ; iter++) {
    Component cmp = (Component)demoComponents.elementAt(iter);
    if(iter < componentsPerRow) {
        cmp.setX(-cmp.getWidth());
    } else {
        if(iter < componentsPerRow * 2) {
            cmp.setX(dw);
        } else {
            cmp.setX(-cmp.getWidth());
        }
    }
}
boxContainer.setShouldCalcPreferredSize(true);
boxContainer.animateHierarchyFade(3000, 30);
The demoComponents Vector contains components from separate containers and this code would not work with a simple animate layout.
Container might be affected by the layout the animation could get clipped and skip. These are hard issues to debug.Sequencing animations via AnimationManager
All the animations go through a per-form queue: the AnimationManager. This effectively prevents two animations from mutating the UI in parallel so you won’t have collisions between two conflicting sides. Things get more interesting when you try to do something like this:
cnt.add(myButton);
int componentCount = cnt.getComponentCount();
cnt.animateLayout(300);
cnt.removeComponent(myButton);
if(componentCount == cnt.getComponentCount()) {
    // this will happen...
}
The reason this happens is that the second remove gets postponed to the end of the animation so it won’t break the animation. This works for remove and add operations on a Container as well as other animations.
The simple yet problematic fix would be:
cnt.add(myButton);
int componentCount = cnt.getComponentCount();
cnt.animateLayoutAndWait(300);
cnt.removeComponent(myButton);
if(componentCount == cnt.getComponentCount()) {
    // this probably won't happen...
}
Why might that still fail?
Events come in constantly during the run of the EDT [6], so an event might come in that might trigger an animation in your code. Even if you’re on the EDT keep in mind that you don’t actually block it and an event might come in.
In those cases an animation might start and you might be unaware of that animation and it might still be in action when you expect remove to work.
Animation manager to the rescue
AnimationManager has built-in support to fix this exact issue.
You can flush the animation queue and run synchronously after all the animations finished and before new ones come in by using something like this:
cnt.add(myButton);
int componentCount = cnt.getComponentCount();
cnt.animateLayout(300);
cnt.getAnimationManager().flushAnimation(() -> {
    cnt.removeComponent(myButton);
    if(componentCount == cnt.getComponentCount()) {
        // this shouldn't happen...
    }
});
Low-level animations
The Codename One event dispatch thread has a special animation "pulse" allowing an animation to update its state and draw itself. Code can make use of this pulse to implement repetitive polling tasks that have little to do with drawing.
This is helpful since the callback will always occur on the event dispatch thread.
Every component in Codename One contains an animate() method that returns a boolean value, you can also implement the Animation interface in an arbitrary component to implement your own animation. To receive animation events you need to register yourself within the parent form, it’s the responsibility of the parent for to call animate().
If the animate method returns true then the animation will be painted (the paint method of the Animation interface would be invoked).
If you derive from a component, which has its own animation logic you might damage its animation behavior by deregistering it, so use care with the low-level API’s.
For example, you can add more animation logic using code like this:
myForm.registerAnimated(this);
private int spinValue;
@Override
public boolean animate() {
   if(userStatusPending) {
       spinValue++;
       super.animate();
       return true;
   }
   return super.animate();
}
Why not just write code in paint
Animations comprise two parts, the logic (deciding the position, etc.) and the painting. The paint method should be dedicated to painting, not to the actual moving of the components.
The separation of concerns allows you to avoid redundant painting for example, if animate didn’t trigger a change return false to avoid the overhead related to animations.
You discuss low-level animations in more details within the animation section of the clock demo.
Transitions
Transitions allow you to replace one component with another, most typically forms or dialogs are replaced with a transition but a transition can be applied to replace any arbitrary component.
Developers can implement their own custom transition and install it to components by deriving the Transition class, although most commonly the built in CommonTransitions class is used for almost everything.
You can define transitions for forms/dialogs/menus globally either via the theme constants or via the LookAndFeel class. Or you can install a transition on top-level components via setter methods.
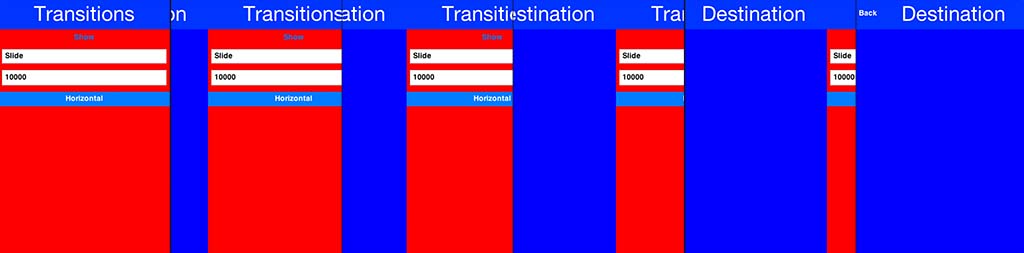
Themes define the default transitions used when showing a form, these differ based on the OS. In most platforms the default is Slide whereas in iOS the default is SlideFade which slides the content pane and title while fading in/out the content of the title area.
SlideFade is problematic without a title area. If you have a Form that lacks a title area you would recommend to disable SlideFade at least for that Form.Check out the full set of theme constants in the Theme Constants Section.
Replace
To apply a transition to a component you can use the Container.replace() method as such:
Form hi = new Form("Replace", new BoxLayout(BoxLayout.Y_AXIS));
Button replace = new Button("Replace Pending");
Label replaceDestiny = new Label("Destination Replace");
hi.add(replace);
replace.addActionListener((e) -> {
    replace.getParent().replaceAndWait(replace, replaceDestiny, CommonTransitions.createCover(CommonTransitions.SLIDE_VERTICAL, true, 800));
    replaceDestiny.getParent().replaceAndWait(replaceDestiny, replace, CommonTransitions.createUncover(CommonTransitions.SLIDE_VERTICAL, true, 800));
});
TableLayout might be tricky in such cases so recommend wrapping a replaceable Component in a border layout and replacing the content.Container.replace() can also be used with a null transition at which point it replaces instantly with no transition.
Slide transitions
The slide transitions are used to move the Form/Component in a sliding motion to the side or up/down. Four basic types of slide transitions exist:
Slide - the most commonly used transition
Fast Slide - historically this provided better performance for old device types. It’s no longer recommended for newer devices
Slide Fade - the iOS default where the title area features a fade transition
Cover/Uncover - a kind of slide transition where the source or destination form slides while the other remains static in place
The code below demonstrates the usage of all the main transitions:
    Toolbar.setGlobalToolbar(true);
    Form hi = new Form("Transitions", new BoxLayout(BoxLayout.Y_AXIS));
    Style bg = hi.getContentPane().getUnselectedStyle();
    bg.setBgTransparency(255);
    bg.setBgColor(0xff0000);
    Button showTransition = new Button("Show");
    Picker pick = new Picker();
    pick.setStrings("Slide", "SlideFade", "Cover", "Uncover", "Fade", "Flip");
    pick.setSelectedString("Slide");
    TextField duration = new TextField("10000", "Duration", 6, TextArea.NUMERIC);
    CheckBox horizontal = CheckBox.createToggle("Horizontal");
    pick.addActionListener((e) -> {
        String s = pick.getSelectedString().toLowerCase();
        horizontal.setEnabled(s.equals("slide") || s.indexOf("cover") > -1);
    });
    horizontal.setSelected(true);
    hi.add(showTransition).
        add(pick).
        add(duration).
        add(horizontal);

    Form dest = new Form("Destination");
    bg = dest.getContentPane().getUnselectedStyle();
    bg.setBgTransparency(255);
    bg.setBgColor(0xff);
    dest.setBackCommand(
            dest.getToolbar().addCommandToLeftBar("Back", null, (e) -> hi.showBack()));

    showTransition.addActionListener((e) -> {
        int h = CommonTransitions.SLIDE_HORIZONTAL;
        if(!horizontal.isSelected()) {
            h = CommonTransitions.SLIDE_VERTICAL;
        }
        switch(pick.getSelectedString()) {
            case "Slide":
                hi.setTransitionOutAnimator(CommonTransitions.createSlide(h, true, duration.getAsInt(3000)));
                dest.setTransitionOutAnimator(CommonTransitions.createSlide(h, true, duration.getAsInt(3000)));
                break;
            case "SlideFade":
                hi.setTransitionOutAnimator(CommonTransitions.createSlideFadeTitle(true, duration.getAsInt(3000)));
                dest.setTransitionOutAnimator(CommonTransitions.createSlideFadeTitle(true, duration.getAsInt(3000)));
                break;
            case "Cover":
                hi.setTransitionOutAnimator(CommonTransitions.createCover(h, true, duration.getAsInt(3000)));
                dest.setTransitionOutAnimator(CommonTransitions.createCover(h, true, duration.getAsInt(3000)));
                break;
            case "Uncover":
                hi.setTransitionOutAnimator(CommonTransitions.createUncover(h, true, duration.getAsInt(3000)));
                dest.setTransitionOutAnimator(CommonTransitions.createUncover(h, true, duration.getAsInt(3000)));
                break;
            case "Fade":
                hi.setTransitionOutAnimator(CommonTransitions.createFade(duration.getAsInt(3000)));
                dest.setTransitionOutAnimator(CommonTransitions.createFade(duration.getAsInt(3000)));
                break;
            case "Flip":
                hi.setTransitionOutAnimator(new FlipTransition(-1, duration.getAsInt(3000)));
                dest.setTransitionOutAnimator(new FlipTransition(-1, duration.getAsInt(3000)));
                break;
        }
        dest.show();
    });
    hi.show();
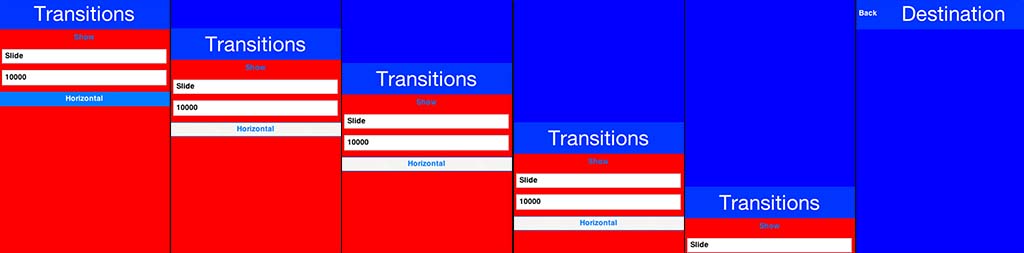
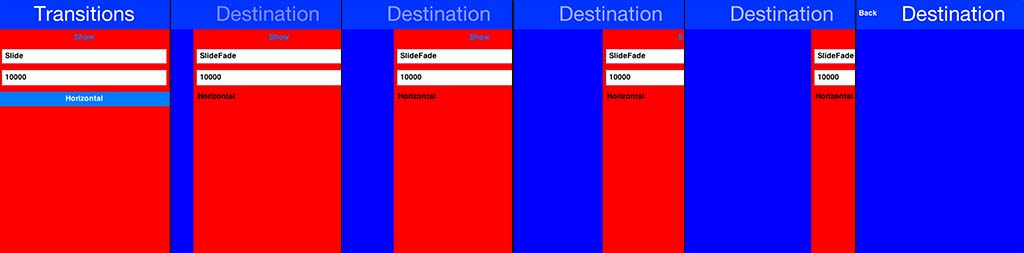
SlideFade is problematic without a title area. If you have a Form that lacks a title area you would recommend to disable SlideFade at least for that Form.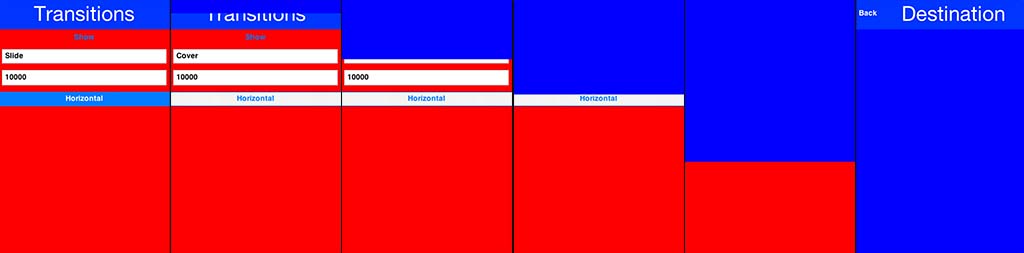
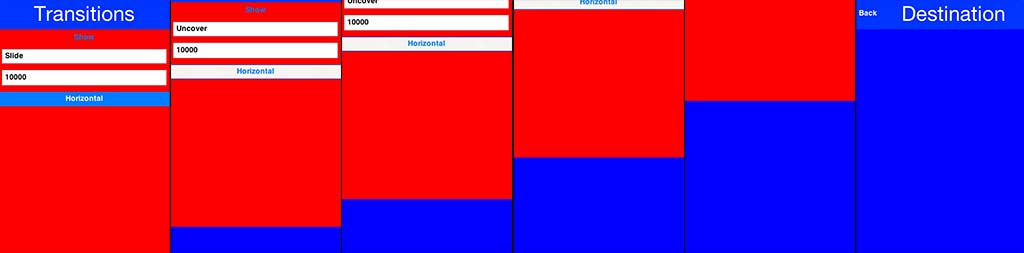
Fade and flip transitions
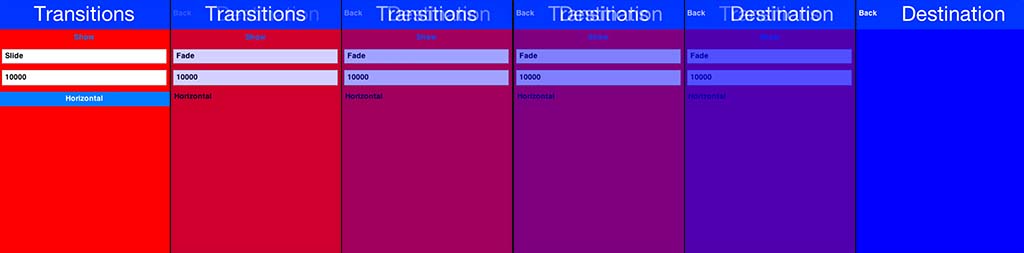
The fade transition is pretty trivial and accepts a time value since it has no directional context.
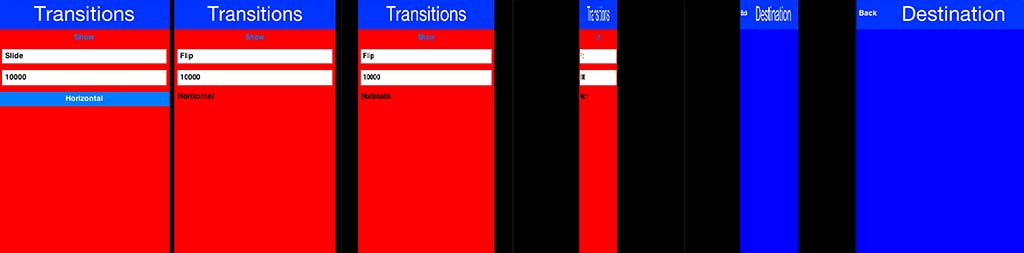
The FlipTransition is also pretty simple but unlike the others it isn’t a part of the CommonTransitions. It has its own FlipTransition class.
Bubble transition
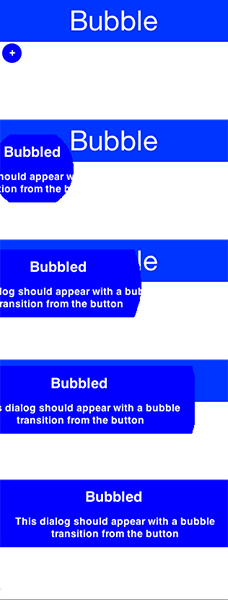
BubbleTransition morphs a component into another component using a circular growth motion.
The BubbleTransition accepts the component that will grow into the bubble effect as one of its arguments. It’s primarily
designed for Dialog transitions although it could work for more creative use cases:
    Form hi = new Form("Bubble");
    Button showBubble = new Button("+");
    showBubble.setName("BubbleButton");
    Style buttonStyle = showBubble.getAllStyles();
    buttonStyle.setBorder(Border.createEmpty());
    buttonStyle.setFgColor(0xffffff);
    buttonStyle.setBgPainter((g, rect) -> {
        g.setColor(0xff);
        int actualWidth = rect.getWidth();
        int actualHeight = rect.getHeight();
        int xPos, yPos;
        int size;
        if(actualWidth > actualHeight) {
            yPos = rect.getY();
            xPos = rect.getX() + (actualWidth - actualHeight) / 2;
            size = actualHeight;
        } else {
            yPos = rect.getY() + (actualHeight - actualWidth) / 2;
            xPos = rect.getX();
            size = actualWidth;
        }
        g.setAntiAliased(true);
        g.fillArc(xPos, yPos, size, size, 0, 360);
    });
    hi.add(showBubble);
    hi.setTintColor(0);
    showBubble.addActionListener((e) -> {
        Dialog dlg = new Dialog("Bubbled");
        dlg.setLayout(new BorderLayout());
        SpanLabel sl = new SpanLabel("This dialog should appear with a bubble transition from the button", "DialogBody");
        sl.getTextUnselectedStyle().setFgColor(0xffffff);
        dlg.add(BorderLayout.CENTER, sl);
        dlg.setTransitionInAnimator(new BubbleTransition(500, "BubbleButton"));
        dlg.setTransitionOutAnimator(new BubbleTransition(500, "BubbleButton"));
        dlg.setDisposeWhenPointerOutOfBounds(true);
        dlg.getTitleStyle().setFgColor(0xffffff);

        Style dlgStyle = dlg.getDialogStyle();
        dlgStyle.setBorder(Border.createEmpty());
        dlgStyle.setBgColor(0xff);
        dlgStyle.setBgTransparency(0xff);
        dlg.showPacked(BorderLayout.NORTH, true);
    });

    hi.show();
Morph transitions
Android’s material design has a morphing effect where an element from the previous form (activity) animates into a different component on a new activity. Codename One has a morph effect in the Container class but it doesn’t work as a transition between forms and doesn’t allow for multiple separate components to transition at once.

To support this behavior you have the MorphTransition class that provides this same effect coupled with a fade to the rest of the UI (see Figure 181, “Morph Transition”).
Since the transition is created before the form exists you can’t reference explicit components within the form
when creating the morph transition (to show which component becomes which) so you need to refer
to them by name. This means you need to use setName(String) on the components in the source/destination
forms so the transition will be able to find them:
Form demoForm = new Form(currentDemo.getDisplayName());
demoForm.setScrollable(false);
demoForm.setLayout(new BorderLayout());
Label demoLabel = new Label(currentDemo.getDisplayName());
demoLabel.setIcon(currentDemo.getDemoIcon());
demoLabel.setName("DemoLabel");
demoForm.addComponent(BorderLayout.NORTH, demoLabel);
demoForm.addComponent(BorderLayout.CENTER, wrapInShelves(n));
// ...
demoForm.setBackCommand(backCommand);
demoForm.setTransitionOutAnimator(
    MorphTransition.create(3000).morph(
        currentDemo.getDisplayName(),
        "DemoLabel"));
f.setTransitionOutAnimator(
    MorphTransition.create(3000).
        morph(currentDemo.getDisplayName(),
        "DemoLabel"));
demoForm.show();
Snapshot mode
By default MorphTransition paints both endpoints by re-rendering the live
source / destination components every frame at the interpolated bounds.
That works well when the source is fully visible — a card in the body
of one form morphing to a card in the next.
It runs into edge cases when the source lives inside a scrolling
container that has children extending past the source’s bounds, or
when the source has dynamic content (a video frame, a BrowserComponent,
a custom-painted background) that should be visually frozen for the
duration of the animation. The legacy live-paint path can leak
off-viewport pixels into the morph because the layered pane that holds
the source during the animation doesn’t carry the original parent’s clip.
To opt into the image-snapshot path call snapshotMode(true) on the
builder:
MorphTransition morph = MorphTransition.create(300)
        .snapshotMode(true)
        .morph("card");
nextForm.setTransitionInAnimator(morph);
nextForm.show();
snapshotMode(true) captures each (source, dest) pair as a clipped
Image at initTransition(), then the tween draws those images at the
interpolated bounds rather than re-painting the live components.
Off-viewport children of the source are clipped at capture time (the
image’s own bounds are the clip), so they can’t leak into the morph.
The default MorphTransition behavior (live paint, no snapshots) is
unchanged for back-compat. Use snapshot mode opportunistically when
the live-paint output exhibits the off-viewport leak, or when the
source’s children produce frame-by-frame visual change you want to
freeze.
SwipeBackSupport
iOS7+ allows swiping back one form to the previous form, Codename One has an API to enable back swipe transition:
SwipeBackSupport.bindBack(currentForm, destination);
That one command will enable swiping back from currentForm. LazyValue allows you to pass a value lazily:
/**
 * Useful when passing a value that might not exist to a function, e.g. When we
 * pass a form that we might need to construct dynamically later on.
 */
public interface LazyValue<T> {
    /**
     * Returns the actual value.
     *
     * @param args optional arguments for the creation of the lazy value
     * @return the value
     */
    T get(Object... args);
}
This effectively allows you to pass a form and create it as necessary (for example, for a GUI builder app you don’t have the actual previous form instance), notice that the arguments aren’t used for this case but will be used in other cases.
The code below should work for the transition sample above. Notice that this API was designed to work with "Slide Fade" transition and might have issues with other transition types:
SwipeBackSupport.bindBack(dest, (args) -> hi);