This will be the last installment of this tutorial which was pretty complete in the previous section already. We might
have additional installments mostly for covering enhancements such as “invite a friend” and other similar capabilites
but this is probably as good a place as any to finish the app and let you try it live.
Native Push
Up until now we used PubNub to implement the push functionality which is excellent especially if you opt for the
paid option which can also persist messages and offers quite a few additional perks for an app such as this.
However, when the app isn’t running PubNub can’t push anything and in that case we need an OS native push to
send the message.
The obvious question would be “why not use OS native push for everything?”.
Its possible to do so but OS native push isn’t as flexible, portable, fast or reliable as PubNub. Its painful to work with
and the user can intentionally or inadvertently break it by disagreeing to an OS prompt etc… As you will see from the
rest of the tutorial where we fallback to native OS push when PubNub can’t reach our target, its no panacea.
The PushCallback Interface
We start by implementing the PushCallback interface in our main class, this must be the actual main class or
push won’t work:
public class SocialChat implements PushCallback {Then we need to implement the following methods:
@Override
public void push(String value) {
    // its a JSON message, otherwise its a notice to the user
    if(value.startsWith("{") || value.startsWith("[")) {
        try {
            JSONObject obj = new JSONObject(value);

            // this is still early since we probably didn't login yet so add the messages to the list of pending messages
            java.util.List<Message> pendingMessages = (java.util.List<Message>)Storage.getInstance().readObject("pendingMessages");
            if(pendingMessages == null) {
                pendingMessages = new ArrayList<>();
            }
            Message m = new Message(obj);
            pendingMessages.add(m);
            Storage.getInstance().writeObject("pendingMessages", pendingMessages);
            addMessage(m);
        } catch(JSONException err) {
            err.printStackTrace();
        }
    }
}

@Override
public void registeredForPush(String deviceId) {
}

@Override
public void pushRegistrationError(String error, int errorCode) {
}
You will notice the following things here:
-
We don’t really need anything in the
registeredForPushorpushRegistrationError. Since we use PubNub even
if push fails the app will still work fine.registeredForPushis normally used to get the push key (which isn’t the argument
passed to that method its thePush.getPushKey()) and send it to your servers so you can trigger a push to this device.
Since here we don’t have a real server we have no use for that method. -
The
pushmethod does the heavy lifting of handling push messages. It can be called anytime and accepts
the push callbacks. It receives both visible and hidden push messages and decides what to do with them based
on their content. -
We don’t show the message during the push callback. It will be invoked before the user had time to login and
so we want to just store theMessageobjects and have them processed later. We still add them to the general
store in case the user decides to kill the app before actually logging in
New Constants & Registration
We need to add the following variables to the class to continue, I masked and changed the values. We’ll go over
them one by one:
private static final String PUSH_TOKEN = "********-****-****-****-*************";
private static final String GCM_SENDER_ID = "99999999999999";
private static final String GCM_SERVER_API_KEY = "******************-********************";
private static final boolean ITUNES_PRODUCTION_PUSH = false;
private static final String ITUNES_PRODUCTION_PUSH_CERT = "https://domain.com/linkToP12Prod.p12";
private static final String ITUNES_PRODUCTION_PUSH_CERT_PASSWORD = "ProdPassword";
private static final String ITUNES_DEVELOPMENT_PUSH_CERT = "https://domain.com/linkToP12Dev.p12";
private static final String ITUNES_DEVELOPMENT_PUSH_CERT_PASSWORD = "DevPassword";
PUSH_TOKEN is the easiest, just login to Codename One and select the account tab. It should appear just
above the Update Details button. If it isn’t there try logging out and logging back in.
You can get the GCM_SENDER_ID & GCM_SERVER_API_KEY from Google very easily. This assumes you
followed our instructions to create a Google project in part 2 of the tutorial. If you skipped that (because you
didn’t need a G+ account login) just make sure to create a new project in the Google API console based on the
instructions in part 2.
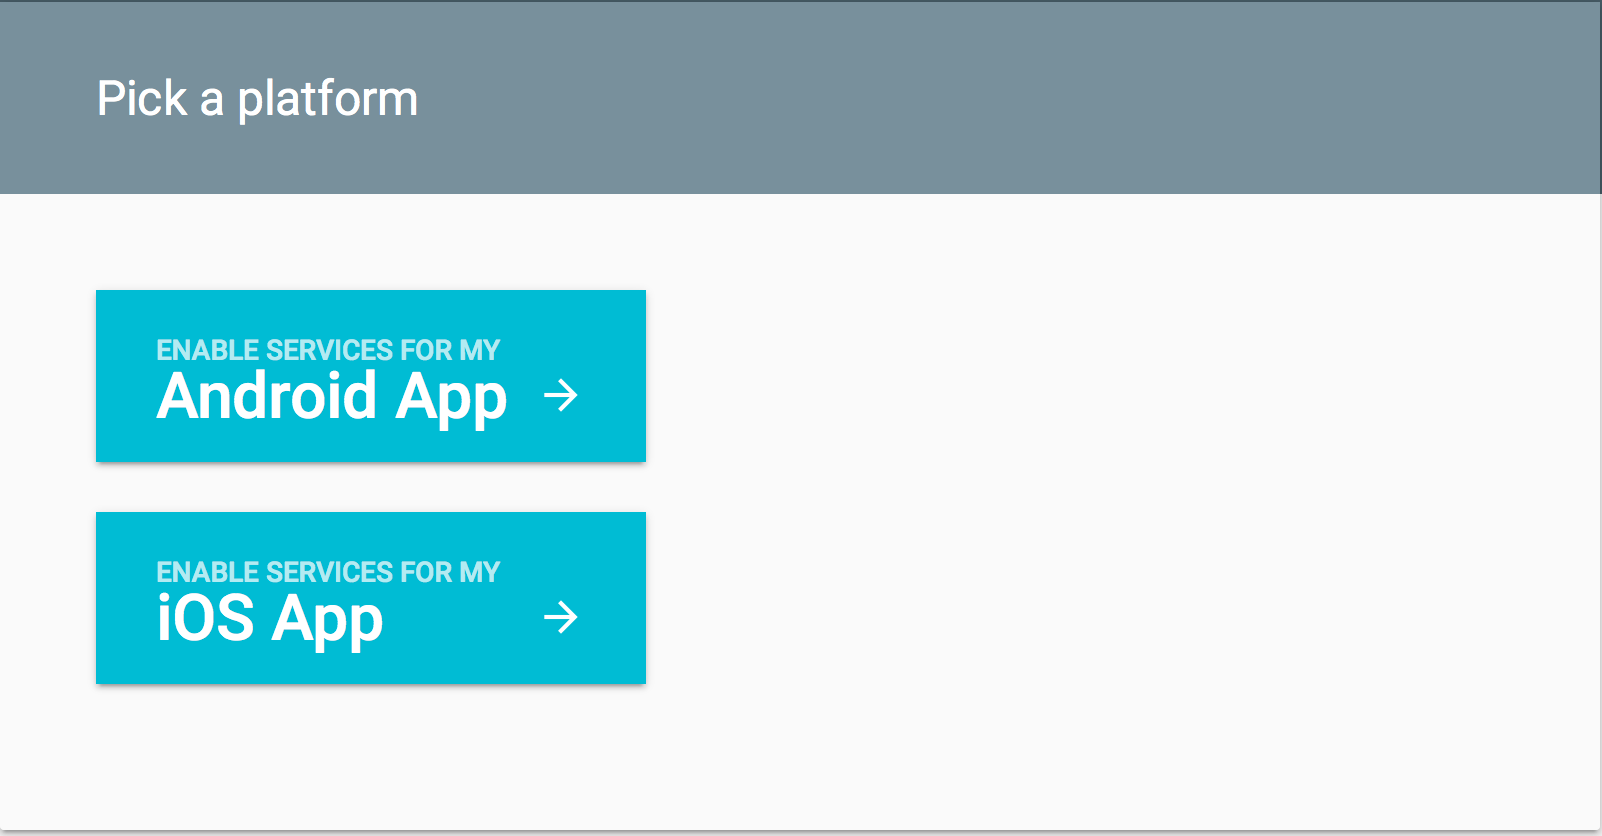
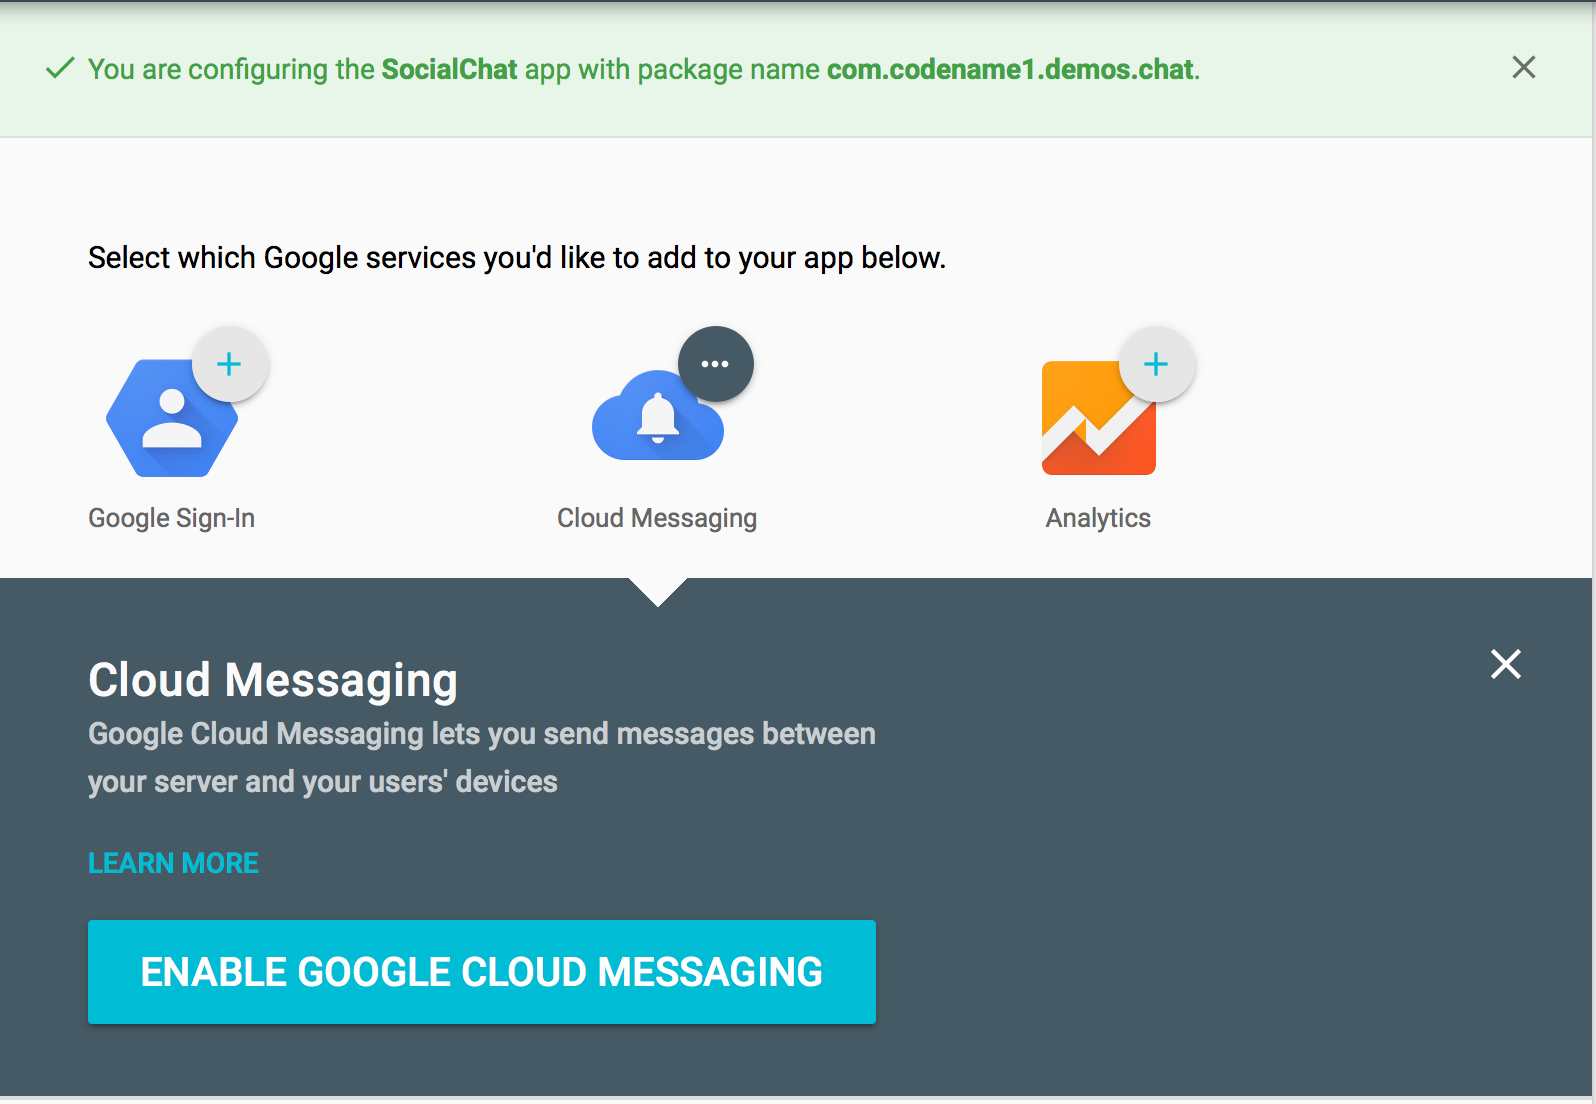
To generate those just go to https://developers.google.com/mobile/add and click “pick a platform”:
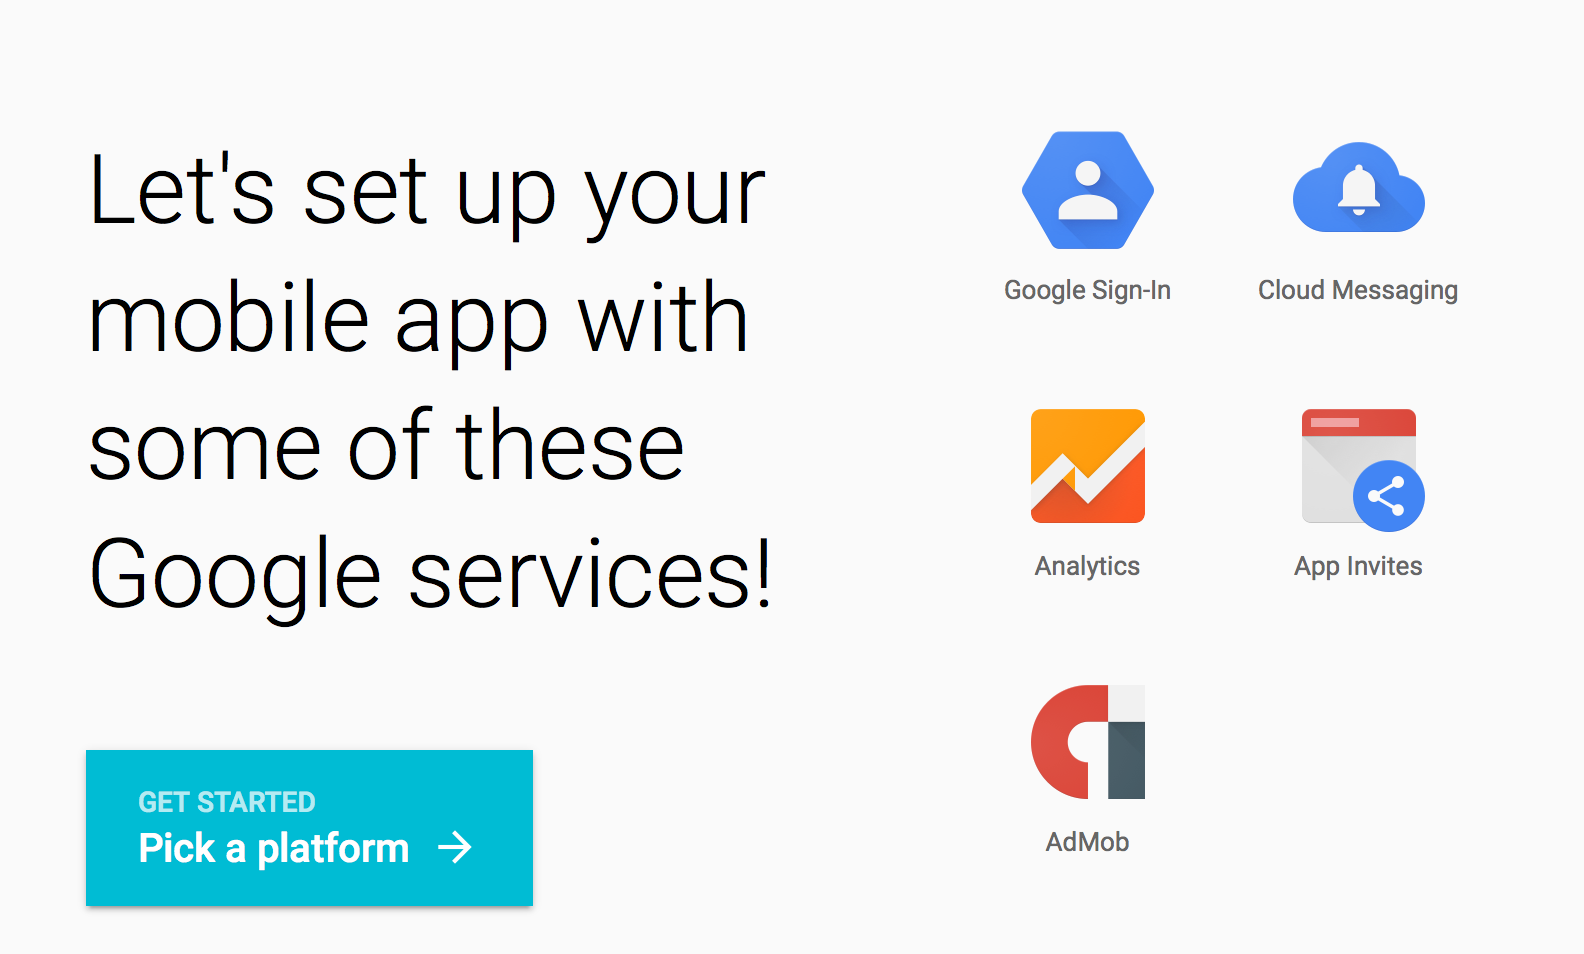
Select “Android App”
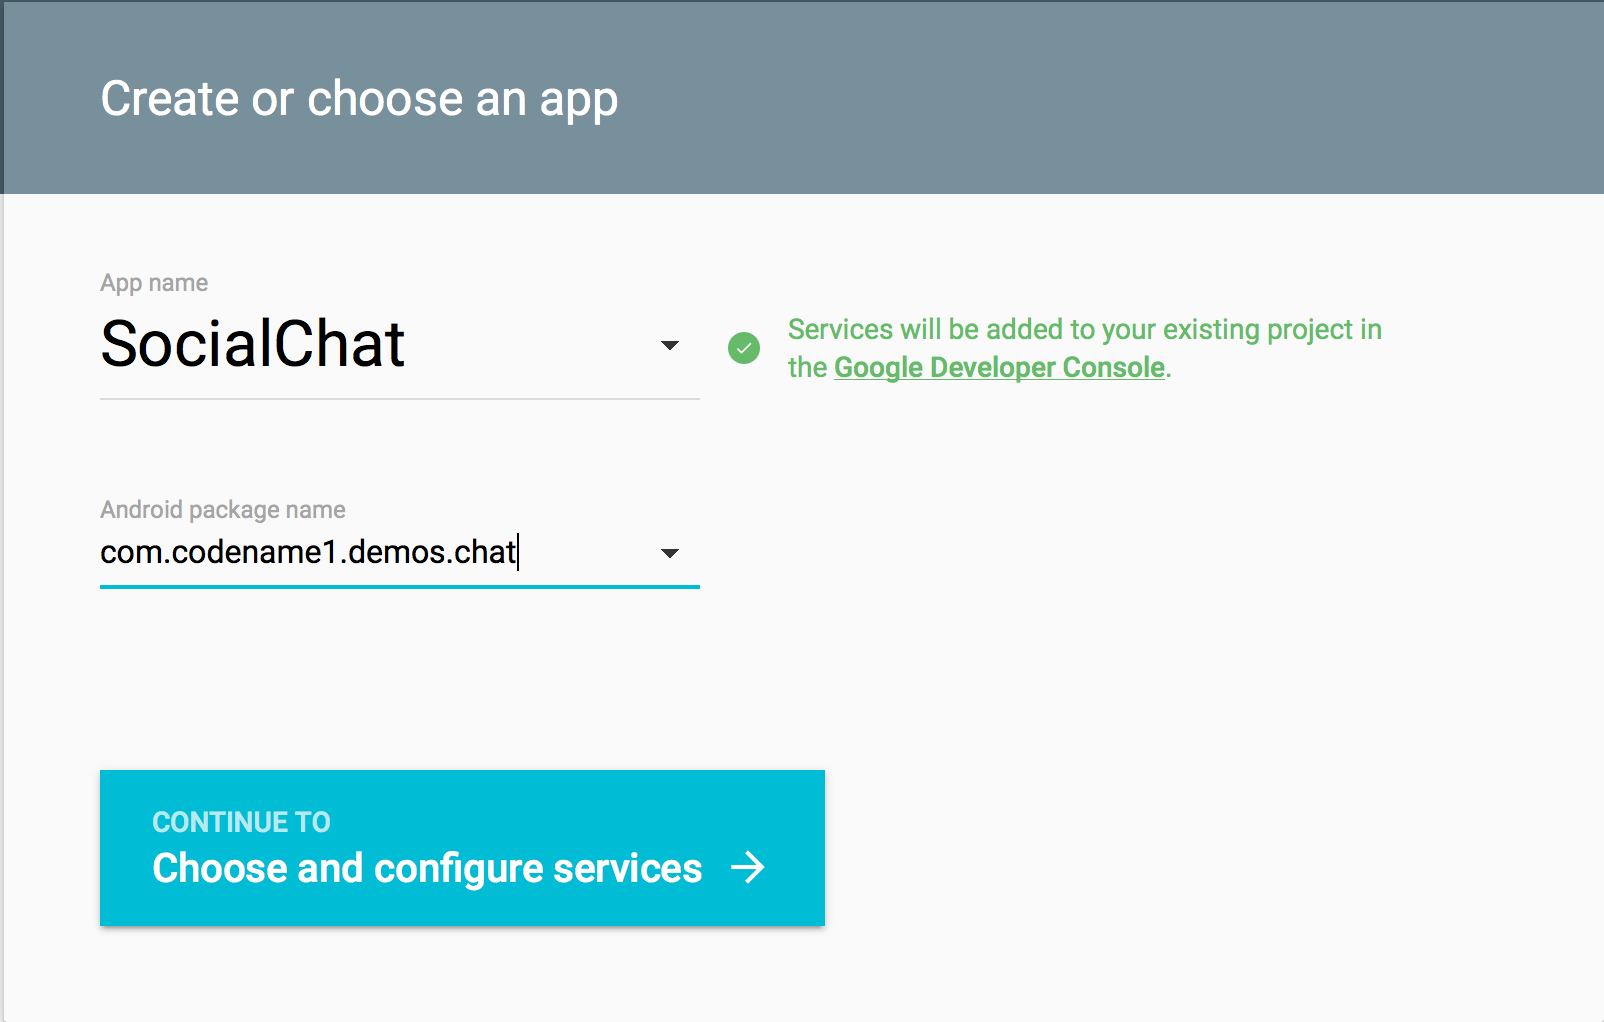
Enter the details for the app and the package
Click the “Cloud Messaging” option then click the “Enable Google Cloud Messaging” button
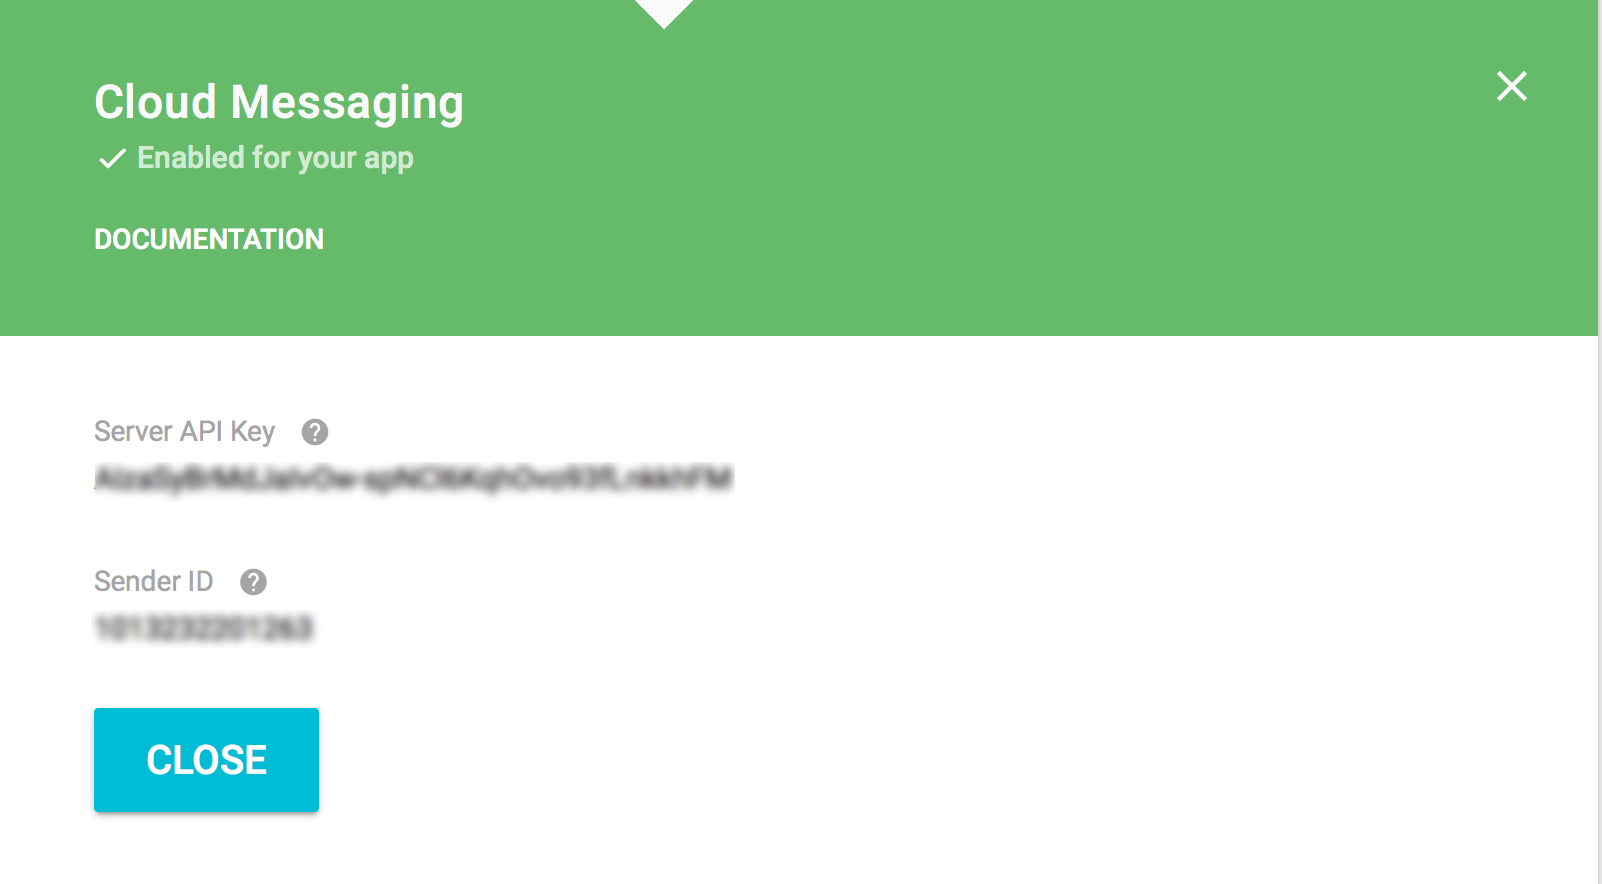
You should now have the values for both GCM_SENDER_ID & GCM_SERVER_API_KEY as illustrated below
Thanks to our new certificate wizard generating the iOS portion of these flags is now a complete breeze!
We just go thru the certificate wizard and check the flag to enable push:

Once you finish that wizard and check the enable push flag make sure that the iOS section also has the “Include Push”
flag checked. There is a bug in the current plugin where it isn’t enabled automatically.
You should receive instructions to include push by email which should include links that you can just paste into place
and passwords. This should be pretty seamless.
Other Code Changes
When you push to a device you need to have the device key which is a unique identifier of the device to which you
want to send a push. Unfortunately since we don’t have a server in place we need somehow pass this key from the
person we are chatting with. The trick is to embed this key into the Message object and thus update it when we receive
a message, this means that we can only send a push message to a person who wrote to us in the past. Not a bad
feature all and all but still a limitation…
To do that we need to do these two simple changes to the Message class:
public Message(JSONObject obj) {
    try {
        time = Long.parseLong(obj.getString("time"));
        senderId = obj.getString("fromId");
        recepientId = obj.getString("toId");
        message = obj.getString("message");
        name = obj.getString("name");
        picture = obj.getString("pic");

        // update the push id for the given user
        if(obj.has("pushId")) {
            String pushId = obj.getString("pushId");
            if(pushId != null) {
                Preferences.set("pid-" + senderId, pushId);
            }
        }
    } catch (JSONException ex) {
        // will this ever happen?
        Log.e(ex);
    }
}

public JSONObject toJSON() {
    String pushId = Push.getPushKey();
    if(pushId != null) {
        JSONObject obj = createJSONObject("fromId", senderId,
                "toId", recepientId,
                "name", name,
                "pic", picture,
                "time", Long.toString(System.currentTimeMillis()),
                "message", message, "pushId", pushId);
        return obj;
    }
    JSONObject obj = createJSONObject("fromId", senderId,
            "toId", recepientId,
            "name", name,
            "pic", picture,
            "time", Long.toString(System.currentTimeMillis()),
            "message", message);
    return obj;
}
This effectively adds a push ID to every message we send if its available and updates a contacts push ID for usage
later.
Now we need to register for push, in the end of the start() method in SocialChat.java we add:
// let the login form show before we register the push so the permission screen doesn't appear on a white
// background
Display.getInstance().callSerially(() -> {
    // registering for push after the UI appears
    Hashtable args = new Hashtable();
    args.put(com.codename1.push.Push.GOOGLE_PUSH_KEY, GCM_SENDER_ID);
    Display.getInstance().registerPush(args, true);
});
We do it this way to let the UI appear first.
Previously in the showChatForm method we just sent a message thru PubNub, now we want there to be a fallback
that will send the message via push. To do that we need to know that the message wasn’t received by the other
side. To discover that we now add a back message in PubNub called “ACK” which will acknowledge the receipt
of a message, if an ACK isn’t received that means the message should be sent thru native push… To do that we add
the class field:
/**
 * Includes messages that received ACK notices from the receiver
 */
private ArrayList<String> pendingAck = new ArrayList<>();
We remove ACK’s automatically in the listenToMessages method as such:
private void listenToMessages() {
    try {
        pb = new Pubnub("pub------------------------------", "sub-------------------------------");
        pb.subscribe(tokenPrefix + uniqueId, new Callback() {
            @Override
            public void successCallback(String channel, Object message, String timetoken) {
                if(message instanceof String) {
                    pendingAck.remove(channel);
                    return;
                }
                Message m = new Message((JSONObject)message);
                pb.publish(tokenPrefix + m.getSenderId(),  "ACK", new Callback() {});
                Display.getInstance().callSerially(() -> {
                    addMessage(m);
                    respond(m);
                });
            }
        });
    } catch(PubnubException err) {
        Log.e(err);
        Dialog.show("Error", "There was a communication error: " + err, "OK", null);
    }
}
In the showChatForm method we need to fallback to push, this is a bit of a large method so I’m only posting
the relevant section here:
final Message messageObject = new Message(tokenPrefix + uniqueId, tokenPrefix + d.uniqueId, imageURL, fullName, text);
JSONObject obj = messageObject.toJSON();

String pid = Preferences.get("pid-" + tokenPrefix + d.uniqueId, null);
if(pid != null) {
    // if we have a push address for the contact we can send them a push if they aren't reachable...
    UITimer timeout = new UITimer(() -> {
        if(pendingAck.contains(tokenPrefix + d.uniqueId)) {
            pendingAck.remove(tokenPrefix + d.uniqueId);
            // send two messages, one hidden with the data as JSON for parsing on the client
            // the other one visible with the text that should appear to the user who isn't running
            // the app, this will allow him to launch the app and then receive the hidden message immediately
            // within the app
            String cert = ITUNES_DEVELOPMENT_PUSH_CERT;
            String pass = ITUNES_DEVELOPMENT_PUSH_CERT_PASSWORD;
            if(ITUNES_PRODUCTION_PUSH) {
                cert = ITUNES_PRODUCTION_PUSH_CERT;
                pass = ITUNES_PRODUCTION_PUSH_CERT_PASSWORD;
            }
            if(Push.sendPushMessage(PUSH_TOKEN, text + ";" + obj.toString(),
                    ITUNES_PRODUCTION_PUSH, GCM_SERVER_API_KEY, cert, pass, 3, pid)) {
                t.getUnselectedStyle().setOpacity(255);
                t.repaint();
                addMessage(messageObject);
            } else {
                chatArea.removeComponent(t);
                chatArea.revalidate();
                Dialog.show("Error", "We couldn't reach " + d.name + " thru push", "OK", null);
            }
        }
    });

    timeout.schedule(10000, false, write.getComponentForm());
    if(!pendingAck.contains(tokenPrefix + d.uniqueId)) {
        pendingAck.add(tokenPrefix + d.uniqueId);
    }
}
The way this works is rather simple:
-
If we have a push id then we create a 10 second timer
-
When the timer elapses we check if the pendingAck is still pending, if so we need to fall back to push
-
We have the device push key from the
Messageclass above so sending the push message is pretty easy
relatively -
We send a type 3 push which includes both a visible and invisible payload separated by a colon (;).
The visible payload is just the text of the message whereas the invisible payload is the JSON string we want to add to the message database
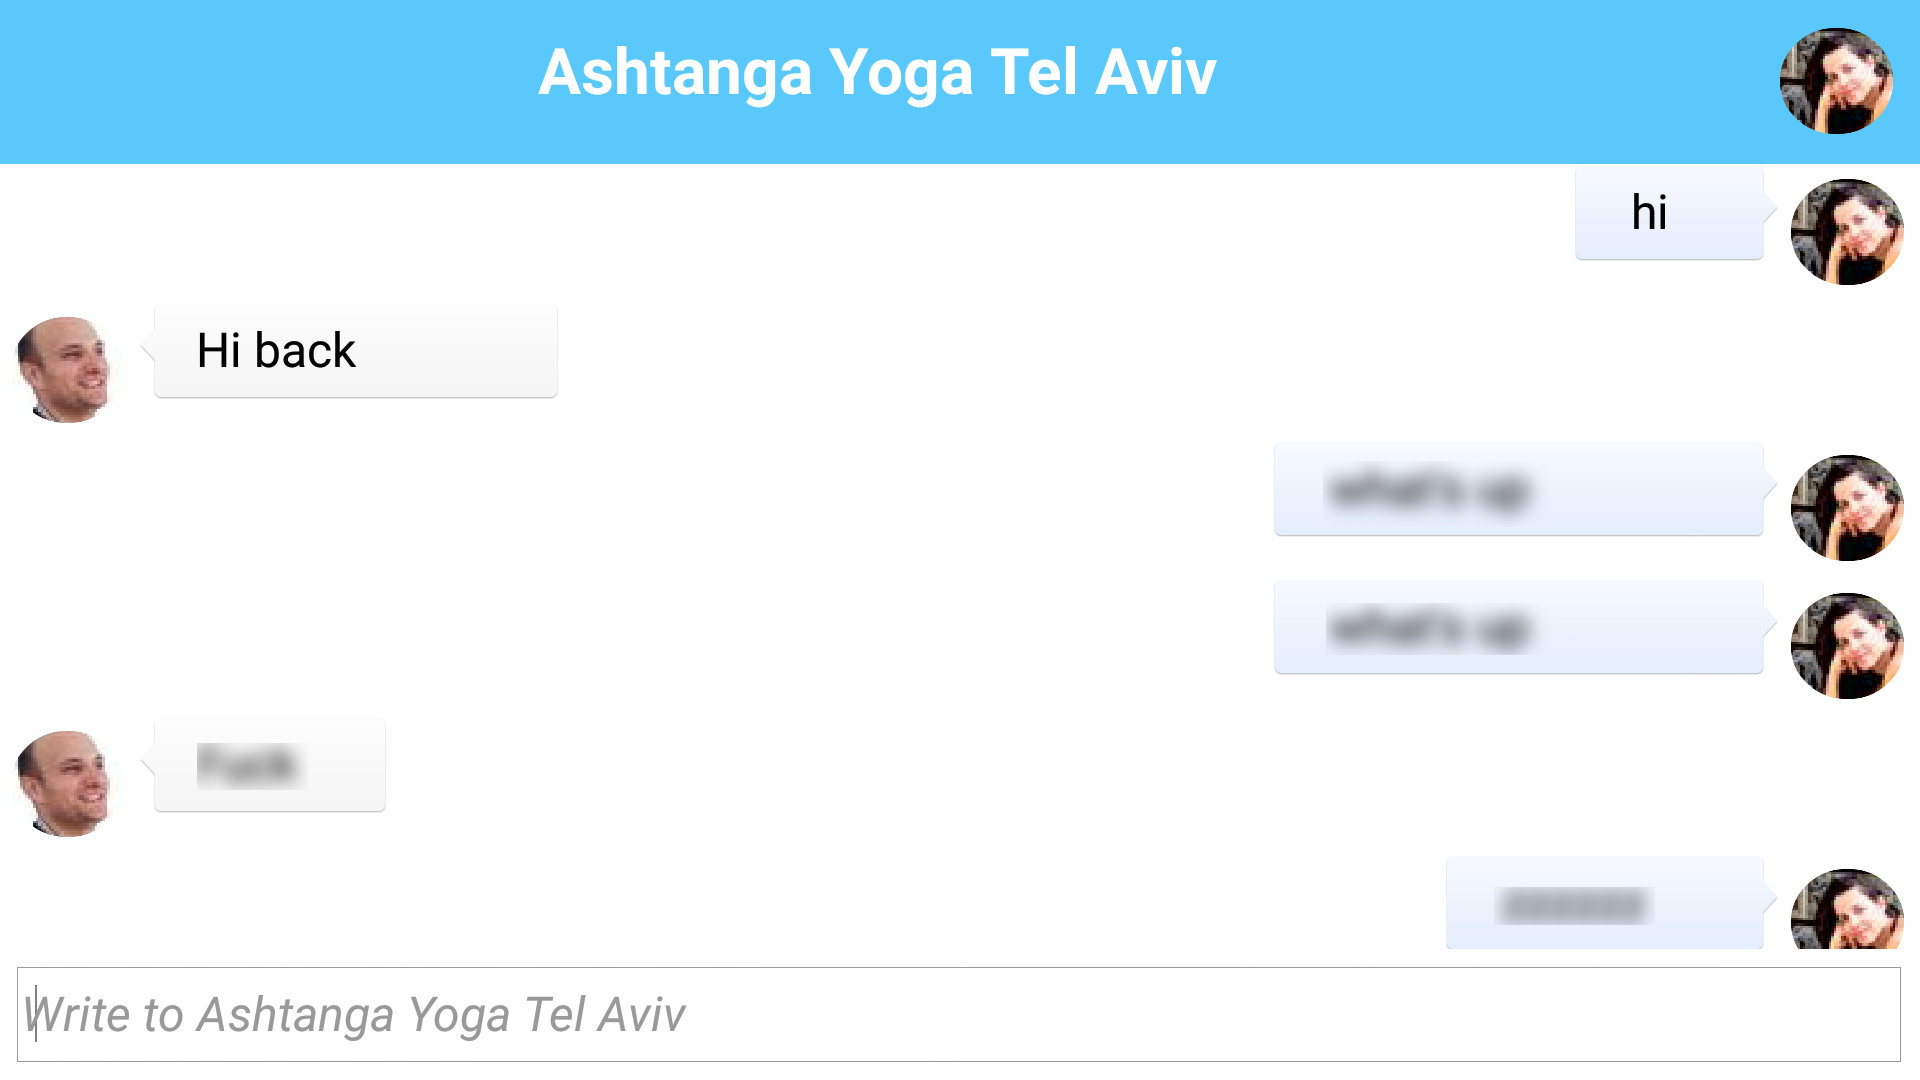
And that’s pretty much it for the chat app!
Final Word
You can check out the final source code of this tutorial here.
When I started off with this tutorial I wasn’t yet familiar with the Parse integration for Codename One.
After playing with it quite a bit and being blown away by it I would have architected this whole app on
top of it and simplified quite a bit in the process. It would also allow me to track push ID’s keep messages
in place and remove some of the issues with going back and forth between PubNub/native push.
I’d still use PubNub without a doubt! Its amazing and very convenient for fast push networking. I think that combining
it with Parse would have made this a much better app.
Login via Google/Facebook etc. was probably the most painful part of the app and I’m including push notification
within the set of pains. While it is much simpler than it used to be and is simpler than the native/web versions I
think the main problem is in the networks opacity and desire to keep the developers close. The pain is less on
our side and more on the tedium of creating apps and passing values to Facebook/Google. The APK hash key
is just painful, there were things such as “invite a friend” which I just avoided because of the tedium.
I might do a rewrite with those thoughts in mind but I’m more inclined to redo this as a cn1lib rather than an app.
The main motivation being end user support for apps, so developers can communicate with users over issues by integrating
a single cn1lib into our app. I’m not sure I’ll have time to dig into something like that but I think it should be
relatively easy since most of the big pieces (push, cloud storage etc.) are already handled by these great 3rd party
services.
Other Posts In This Series
This is a multi-part series of posts including the following parts:
You can check out the final source code of this tutorial here.

12 Comments
Nice to see the concluding ‘edition’ of this series. I’ve scanned quickly through the post and I have a few questions:
1. Can you please explain what you mean by visible and hidden push? I had a look at the Push Javadoc and didn’t seem to find any sendPushMessage() method meeting the signature you used.
2. You say that the PushCallback must be implemented by the main class.
(a) Why is that needed?
(b) For a GUI builder application this would be the StateMachine class right?
1. Both iOS and Android allow delivering a payload that is hidden so we can just update application state from the server.
Hidden push is just push type==2 and type 3 means we are sending two push entries in a single operation: [http://www.codenameone.com/…](http://www.codenameone.com/blog/pushing-it.html)
The javadocs should be updated this is related to the new push architecture: [http://www.codenameone.com/…](http://www.codenameone.com/blog/new-push-servers.html)
2. The main class represents the lifecycle (start, stop etc.) and that is effectively where push resides in the native platform. So we mapped it to there. A main class exists even in a GUI builder app, its not the statemachine class.
Clear. Thanks
Cloned the chat, and the following is shown just after I login with Google:
java.lang.NullPointerException
at com.codename1.ui.html.HTMLComponent.newLine([HTMLComponent.java](http://HTMLComponent.java):1872)
at com.codename1.ui.html.HTMLComponent.processTag([HTMLComponent.java](http://HTMLComponent.java):3289)
at com.codename1.ui.html.HTMLComponent.processTag([HTMLComponent.java](http://HTMLComponent.java):3273)
at com.codename1.ui.html.HTMLComponent.processTag([HTMLComponent.java](http://HTMLComponent.java):3273)
at com.codename1.ui.html.HTMLComponent.processTag([HTMLComponent.java](http://HTMLComponent.java):3273)
at com.codename1.ui.html.HTMLComponent.rebuildPage([HTMLComponent.java](http://HTMLComponent.java):1757)
at com.codename1.ui.html.HTMLComponent.documentReady([HTMLComponent.java](http://HTMLComponent.java):1143)
at com.codename1.ui.html.HTMLComponent.streamReady([HTMLComponent.java](http://HTMLComponent.java):1058)
at com.codename1.components.WebBrowser$4$1.readResponse([WebBrowser.java](http://WebBrowser.java):138)
at com.codename1.io.ConnectionRequest.performOperation([ConnectionRequest.java](http://ConnectionRequest.java):483)
at com.codename1.io.NetworkManager$[NetworkThread.run](http://NetworkThread.run)([NetworkManager.java](http://NetworkManager.java):282)
at [com.codename1.impl.Codename…](http://com.codename1.impl.CodenameOneThread.run)([CodenameOneThread.java](http://CodenameOneThread.java):176)
What could be the problem?
Make sure you are running under Java 8. You are falling back to use code that doesn’t have access to the webkit browser.
Thanks, that was the problem! Awesome tutorials by the way
followed all the instructions & this is what happened ….
ant -f C:\Users\Administrator\Documents\NetBeansProjects\SocialChat1 -[Dnb.internal.action.name](http://Dnb.internal.action.name)=run run
No GUI Entries available
init:
Deleting: C:UsersAdministratorDocumentsNetBeansProjectsSocialChat1build[built-jar.properties](http://built-jar.properties)
deps-jar:
Updating property file: C:UsersAdministratorDocumentsNetBeansProjectsSocialChat1build[built-jar.properties](http://built-jar.properties)
Compile is forcing compliance to the supported API’s/features for maximum device compatibility. This allows smaller
code size and wider device support
compile:
run:
Dec 08, 2016 3:56:07 AM java.util.prefs.WindowsPreferences <init>
WARNING: Could not open/create prefs root node SoftwareJavaSoftPrefs at root 0x80000002. Windows RegCreateKeyEx(…) returned error code 5.
java.lang.ClassNotFoundException: com.mycompany.myapp.MyApplication
at java.net.URLClassLoader.findClass([URLClassLoader.java](http://URLClassLoader.java):381)
at java.lang.ClassLoader.loadClass([ClassLoader.java](http://ClassLoader.java):424)
at sun.misc.Launcher$AppClassLoader.loadClass([Launcher.java](http://Launcher.java):331)
at java.lang.ClassLoader.loadClass([ClassLoader.java](http://ClassLoader.java):357)
at java.lang.ClassLoader.findSystemClass([ClassLoader.java](http://ClassLoader.java):1004)
at com.codename1.impl.javase.ClassPathLoader.findClass([ClassPathLoader.java](http://ClassPathLoader.java):100)
at com.codename1.impl.javase.ClassPathLoader.loadClass([ClassPathLoader.java](http://ClassPathLoader.java):50)
at java.lang.Class.forName0(Native Method)
at java.lang.Class.forName([Class.java](http://Class.java):264)
at com.codename1.impl.javase.Executor$[1.run](http://1.run)([Executor.java](http://Executor.java):86)
at java.awt.event.InvocationEvent.dispatch([InvocationEvent.java](http://InvocationEvent.java):311)
at java.awt.EventQueue.dispatchEventImpl([EventQueue.java](http://EventQueue.java):756)
at java.awt.EventQueue.access$500([EventQueue.java](http://EventQueue.java):97)
at java.awt.EventQueue$[3.run](http://3.run)([EventQueue.java](http://EventQueue.java):709)
at java.awt.EventQueue$[3.run](http://3.run)([EventQueue.java](http://EventQueue.java):703)
at java.security.AccessController.doPrivileged(Native Method)
at java.security.ProtectionDomain$JavaSecurityAccessImpl.doIntersectionPrivilege([ProtectionDomain.java](http://ProtectionDomain.java):76)
at java.awt.EventQueue.dispatchEvent([EventQueue.java](http://EventQueue.java):726)
at java.awt.EventDispatchThread.pumpOneEventForFilters([EventDispatchThread.java](http://EventDispatchThread.java):201)
at java.awt.EventDispatchThread.pumpEventsForFilter([EventDispatchThread.java](http://EventDispatchThread.java):116)
at java.awt.EventDispatchThread.pumpEventsForHierarchy([EventDispatchThread.java](http://EventDispatchThread.java):105)
at java.awt.EventDispatchThread.pumpEvents([EventDispatchThread.java](http://EventDispatchThread.java):101)
at java.awt.EventDispatchThread.pumpEvents([EventDispatchThread.java](http://EventDispatchThread.java):93)
at [java.awt.EventDispatchThrea…](http://java.awt.EventDispatchThread.run)([EventDispatchThread.java](http://EventDispatchThread.java):82)
Java Result: 1
BUILD SUCCESSFUL (total time: 2 seconds)
Please help this is 2nd time i m trying to make this chat app
It clearly says: ClassNotFoundException: com.mycompany.myapp.MyApplication
You created a project and then modified the package/class name after the fact without fixing it everywhere.
now how can i fix it ….when i was making first one…my application was used by me but now Social Chat and Message are 2 classes as mentioned in tutorials …..so now what to do…..& plz tell me that where i need to fix it Plzz let me know how to fix it
i guess i have done that….but now there is java:108 indicating problem in roundPlaceholder = EncodedImage.createFromImage(userPlaceholder.scaled(mask.getWidth(), mask.getHeight()).applyMask(mask.createMask()), false);
this is what happened
Compile is forcing compliance to the supported API’s/features for maximum device compatibility. This allows smaller
code size and wider device support
compile:
run:
Dec 09, 2016 2:30:38 AM java.util.prefs.WindowsPreferences <init>
WARNING: Could not open/create prefs root node SoftwareJavaSoftPrefs at root 0x80000002. Windows RegCreateKeyEx(…) returned error code 5.
java.lang.NullPointerException
at com.mycompany.myapp.Gchat.init([Gchat.java](http://Gchat.java):108)
at sun.reflect.NativeMethodAccessorImpl.invoke0(Native Method)
at sun.reflect.NativeMethodAccessorImpl.invoke([NativeMethodAccessorImpl.java](http://NativeMethodAccessorImpl.java):62)
at sun.reflect.DelegatingMethodAccessorImpl.invoke([DelegatingMethodAccessorImp…](http://DelegatingMethodAccessorImpl.java):43)
at java.lang.reflect.Method.invoke([Method.java](http://Method.java):498)
at com.codename1.impl.javase.Executor$1$[1.run](http://1.run)([Executor.java](http://Executor.java):81)
at com.codename1.ui.Display.processSerialCalls([Display.java](http://Display.java):1152)
at com.codename1.ui.Display.mainEDTLoop([Display.java](http://Display.java):969)
at [com.codename1.ui.RunnableWr…](http://com.codename1.ui.RunnableWrapper.run)([RunnableWrapper.java](http://RunnableWrapper.java):120)
at [com.codename1.impl.Codename…](http://com.codename1.impl.CodenameOneThread.run)([CodenameOneThread.java](http://CodenameOneThread.java):176)
plz let me know how to fix it
i guess i have fixed it …but now i got this
Dec 09, 2016 9:37:28 PM java.util.prefs.WindowsPreferences <init>
WARNING: Could not open/create prefs root node SoftwareJavaSoftPrefs at root 0x80000002. Windows RegCreateKeyEx(…) returned error code 5.
java.lang.NullPointerException
at com.mycompany.myapp.Gchat.init([Gchat.java](http://Gchat.java):108)
at sun.reflect.NativeMethodAccessorImpl.invoke0(Native Method)
at sun.reflect.NativeMethodAccessorImpl.invoke([NativeMethodAccessorImpl.java](http://NativeMethodAccessorImpl.java):62)
at sun.reflect.DelegatingMethodAccessorImpl.invoke([DelegatingMethodAccessorImp…](http://DelegatingMethodAccessorImpl.java):43)
at java.lang.reflect.Method.invoke([Method.java](http://Method.java):498)
at com.codename1.impl.javase.Executor$1$[1.run](http://1.run)([Executor.java](http://Executor.java):81)
at com.codename1.ui.Display.processSerialCalls([Display.java](http://Display.java):1152)
at com.codename1.ui.Display.mainEDTLoop([Display.java](http://Display.java):969)
at [com.codename1.ui.RunnableWr…](http://com.codename1.ui.RunnableWrapper.run)([RunnableWrapper.java](http://RunnableWrapper.java):120)
at [com.codename1.impl.Codename…](http://com.codename1.impl.CodenameOneThread.run)([CodenameOneThread.java](http://CodenameOneThread.java):176)
Java Result: 1
Plzzz let me know how to fix it
i fixed it …but now when i press signin with google after asking my e-mail and password it goes to codenameone page and says PAGE NOT FOUND and when i press signin with facebook it says “Can’t Load URL: The domain of this URL isn’t included in the app’s domains. To be able to load this URL, add all domains and subdomains of your app to the App Domains field in your app settings”
Pllzzz let me know how to fix it
That usually means you got a login callback with success and that the page is no longer relevant. Notice that the experience on the device differs greatly from the experience in the simulator since you will use the native login there.
Make sure you defined the app correctly and have the right calls within the login success/fail.