
In this tutorial we will cover the basics of building a good looking chat application with Codename One that
will work on all mobile OS’s. We will cover everything from design to social network login and the actual
chat behavior. This tutorial is for a hand coded application mostly because GUI builder tutorials require video
and are thus less searchable.
This project is created with the new Java 8 support to make the code simple and short.
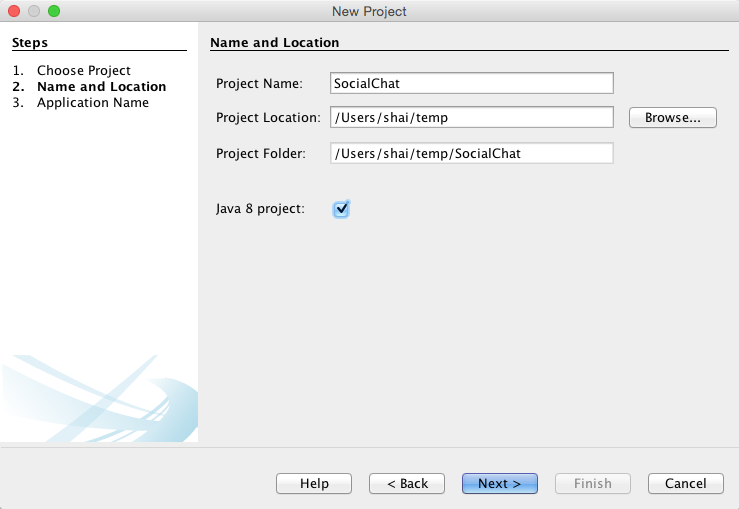
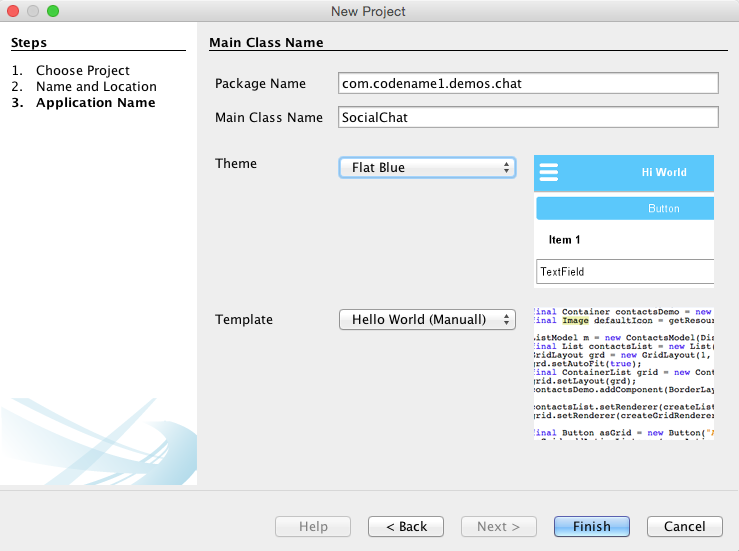
Creating The New Project
We create a new Codename One project and select the new flat blue theme.
Once finish is clicked we have a new project in place, so we need some files to get started. First place the file
fontello.ttf in the src directory. This font file contains image font icons which we will
use to provide icons in the UI.
Next you will need to save this image to your hard drive for use in the first form.
Login UI
Now that we have all the rest in order its time to launch the designer by double clicking the theme file. In the designer
we need to click the Images→Quick Add Multi Images option, then select the image you downloaded to the disk.
When prompted leave the default of Very High, this will effectively create a multi image which stores the image
in multiple different resolutions and deliver the properly sized image based on the device density at hand.
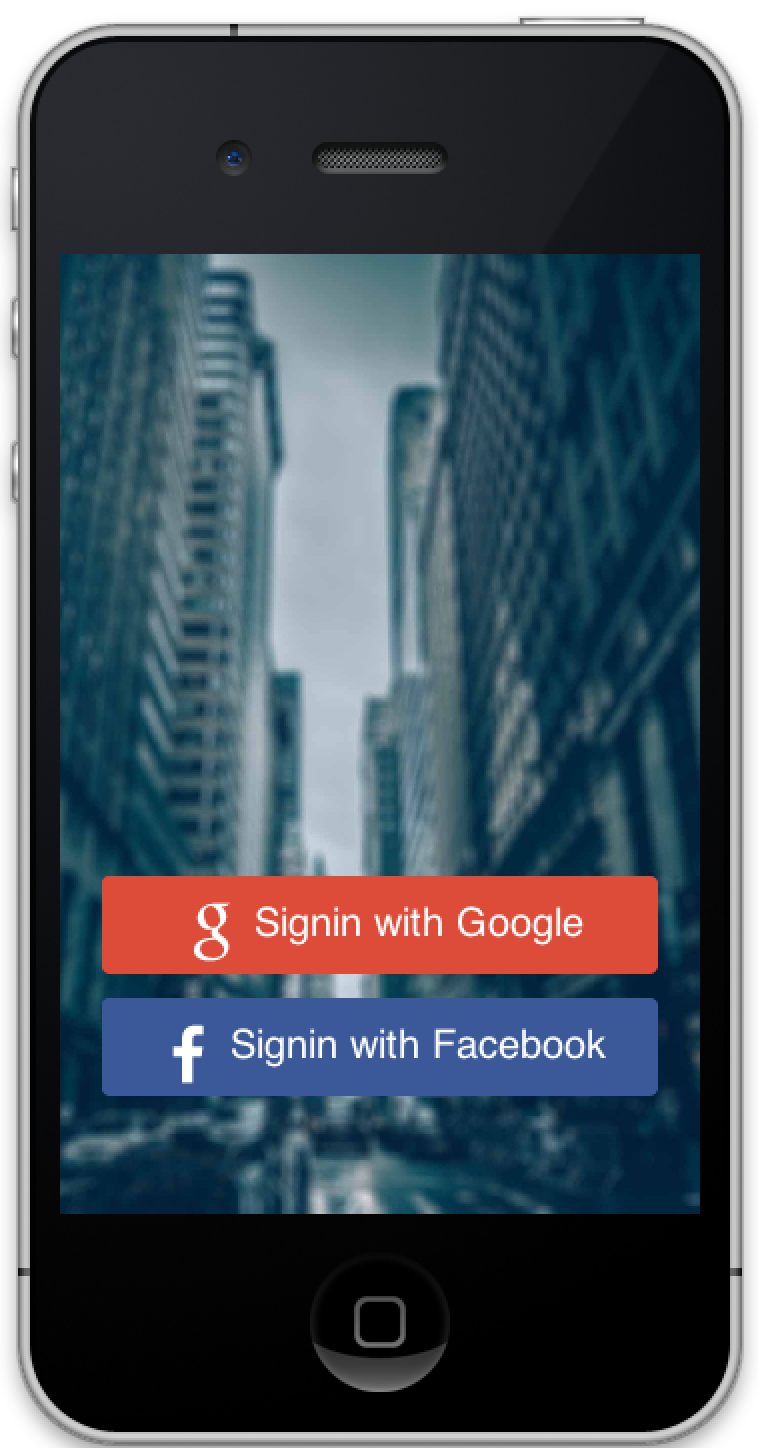
Now we can just create the main form which is the entry point to the app, this will end up looking as such:
To achieve this we select the main theme and click the add button to add a new entry. We then type in MainForm
in the top area and design the form:
-
In the first tab we uncheck ‘derive’ and select the type as
IMAGE_SCALED_FILL. This effectively means we will
use an image as the background and scale it across the screen. We also make sure to select the multi image that
we just added. -
In the Derive tab we uncheck
derive(slightly confusing), then selectFormin the combo box. This means that the
MainFormstyle inherits the basic settings from the Form style.
Add another UIID called Padding so we can space the buttons away from the sides/bottoms of the form:
-
In the color tab uncheck the
Derive Transparencyand set the value to 0. This will make the container invisible. -
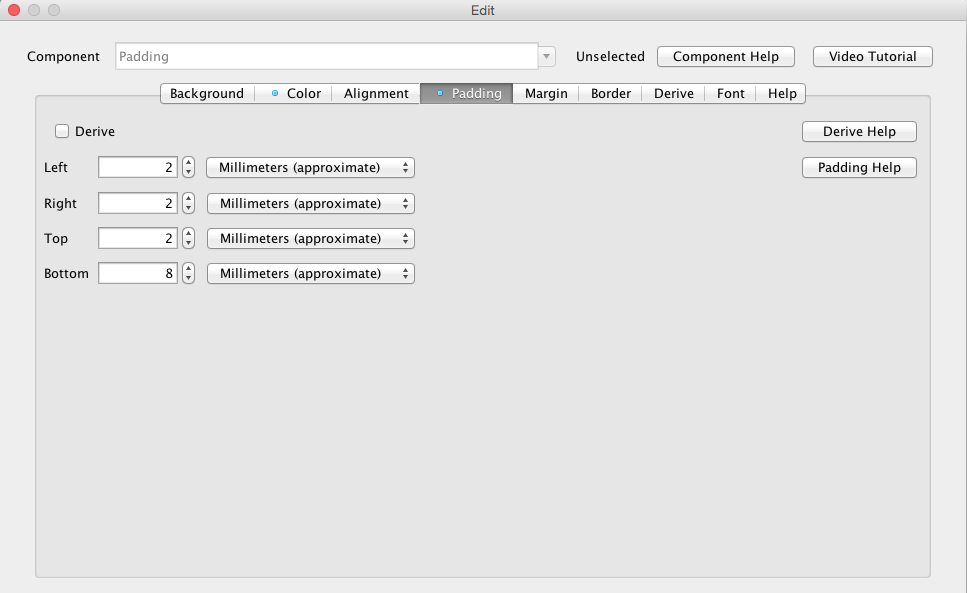
In the padding section uncheck
deriveand enter 2 millimeters for all entries except for the bottom where we need 8 millimeters for extra spacing.
This will space out the various pieces, its important to use millimeters otherwise the result will be too different on various devices based
on their density.
Initial Code
In the code we open the main SocialChat class and replace the start method with this:
public void start() {
    if(current != null){
        current.show();
        return;
    }
    showLoginForm();
}

private void showLoginForm() {
    Form loginForm = new Form();

    // the blue theme styles the title area normally this is good but in this case we don't want the blue bar at the top
    loginForm.getTitleArea().setUIID("Container");
    loginForm.setLayout(new BorderLayout());
    loginForm.setUIID("MainForm");
    Container cnt = new Container(new BoxLayout(BoxLayout.Y_AXIS));
    cnt.setUIID("Padding");
    Button loginWithGoogle = new Button("Signin with Google");
    Button loginWithFacebook = new Button("Signin with Facebook");
    cnt.addComponent(loginWithGoogle);
    cnt.addComponent(loginWithFacebook);
    loginWithGoogle.addActionListener((e) -> {
        doLogin(GoogleConnect.getInstance());
    });
    loginWithFacebook.addActionListener((e) -> {
        doLogin(FacebookConnect.getInstance());
    });
    loginForm.addComponent(BorderLayout.SOUTH, cnt);
    loginForm.show();
}

void doLogin(Login lg) {
    // TODO...
}
You will end up with something that looks like this:

To get the buttons to the right color we and add the icons we will need to go back to the designer….
Customizing The Buttons
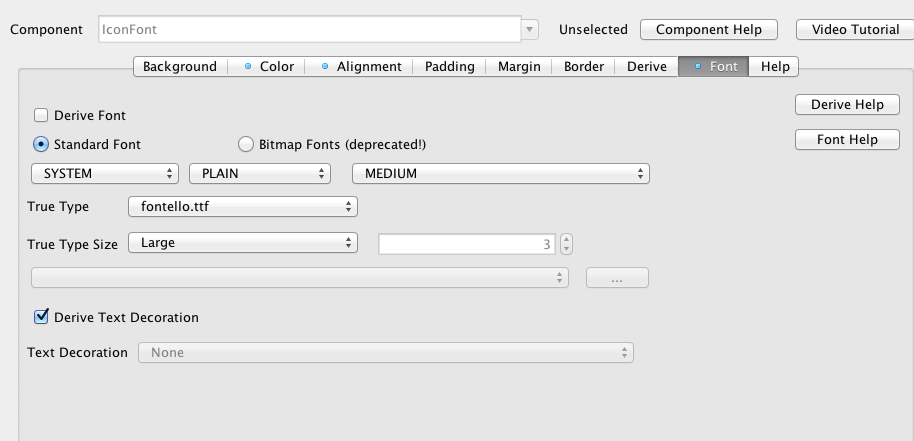
Lets start with the icons, since we use an icon font this is pretty easy… Just add a new style UIID to the theme called
IconFont.
-
In the color section click
Derive Foregroundand type inffffffto set the foreground to white, then click
Derive Transparencyand set it to zero. -
In the Font tab uncheck the
Deriveflag and select thefontello.ttffont (make sure you downloaded it and placed it
in the src directory as instructed earlier). Select theTrue Type Sizeas Large.
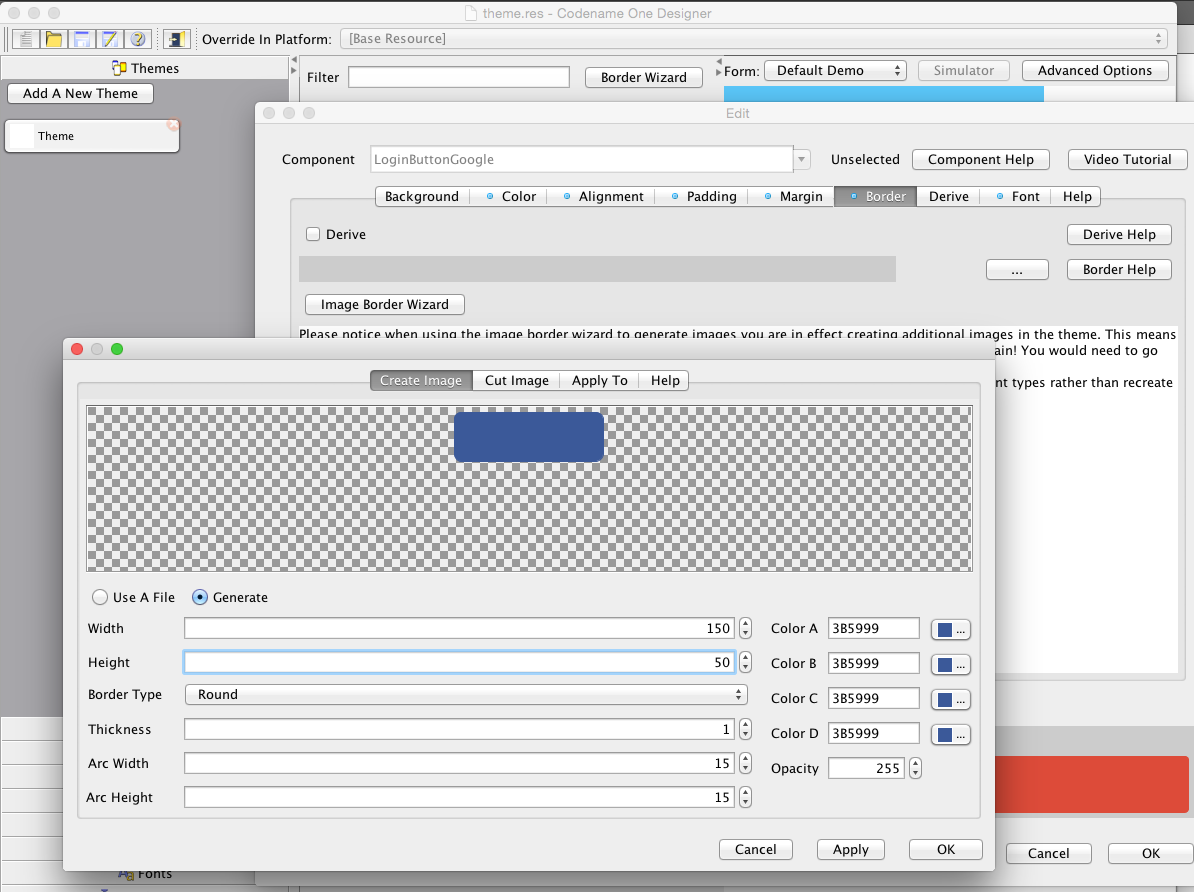
To get the buttons to work nicely we need to create an image border add 2 new UIID’s named LoginButtonGoogle &
LoginButtonFacebook. Both should be identical with the exception of the color for the background…
-
In the color tab set the foreground to
ffffffand transparency to 0 (naturally uncheck derive in both cases). -
In the
Alignmenttab uncheck derive and define the alignment asCenter. -
In the padding and margin tabs define all top/bottom/left/right paddings/margins to be 1 millimeter.
-
In the font tab define the system font to be large.
-
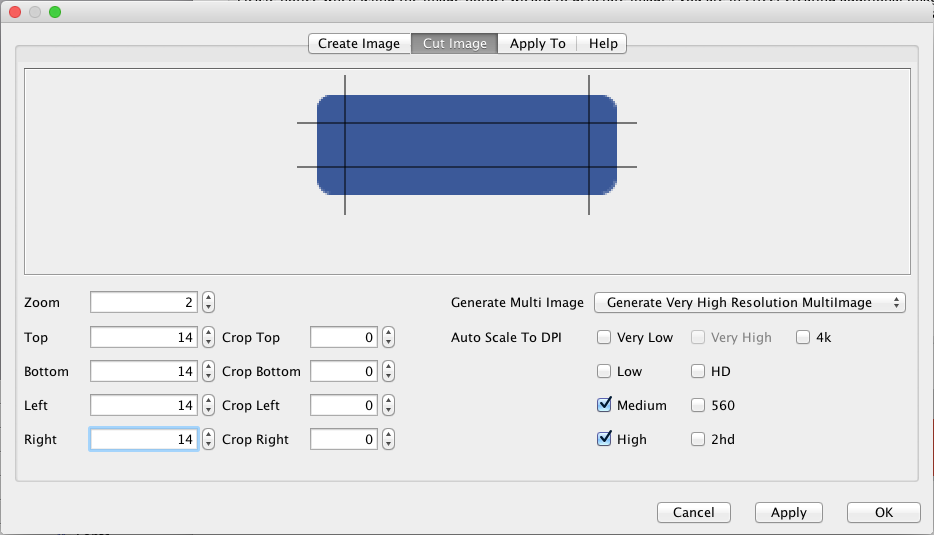
In the border section click the
Image Border Wizardbutton. For the Facebook button enter 3B5999 to all the color fields
for the Google button enter DD4B39 to all the color fields. Increase the arc width/height to 15 and then move to the
Cut Imagesection. Enter 14 for the top/bottom/left & right values and press OK. This will effectively cut 9 multi images
out of the given image and make a border out of them!
Integrating These Changes
Now we can easily integrate the above changes in the code by just changing these lines:
Button loginWithGoogle = new Button("Signin with Google");
loginWithGoogle.setUIID("LoginButtonGoogle");
Button loginWithFacebook = new Button("Signin with Facebook");
loginWithFacebook.setUIID("LoginButtonFacebook");
Style iconFontStyle = UIManager.getInstance().getComponentStyle("IconFont");
loginWithFacebook.setIcon(FontImage.create(" ue96c ", iconFontStyle));
loginWithGoogle.setIcon(FontImage.create(" ue976 ", iconFontStyle));
These effectively assign the new UIID and create two icons with the given font defined within the icon font style!
Other Posts In This Series
This is a multi-part series of posts including the following parts:
You can check out the final source code of this tutorial here.

11 Comments
Lets move on Shai…..whats next?
We will post it when its ready.
Great sir
I notice in the documentation that you recommend not using .getTitleArea().setUIID(“Container”); anymore because it allowed hacks.
How can we remove the TitleArea now?
getTitleArea() is deprecated because it was used as getTitleArea().removeAll(); getTitleArea().addComponent(myCmp);
That was a hack we allowed in some cases but now that we have the toolbar it’s redundant & messy. Even when we allowed the hack it was discouraged because it relies too much on implementation details. However, setting the UIID doesn’t rely as much on the implementation details.
You can avoid this though by adding a UIID TitleArea and overriding the styling to make it transparent, without a border, padding or margin.
Ah I understand! Thank you for the explanation. I will also play around with the customisation of TitleArea within the Theme Editor.
About “FontImage.create(” ue96c “, iconFontStyle)”, what is the meaning of ” ue96c “? How is chosen or generated this string? Thank you.
This tutorial was written before we had material design icons integrated into Codename One so I used the fontello fonts which include various icons. When you download a font from fontello you get an HTML with all the codes in the font. I explained this here: [https://www.codenameone.com…](https://www.codenameone.com/blog/using-icon-fonts-such-as-fontello.html)
I’ve just seen that interesting tutorial, useful if I need custom icons not included in the material icons set. Thank you
Do I need to be a JAVA expert to go through this course …??
No. But you should know Java language syntax.